How to build Sebastian's pocket AI assistant using a Raspberry Pi Zero 2 W and OpenClaw
You’re about to hold a tiny computer that talks back to you.
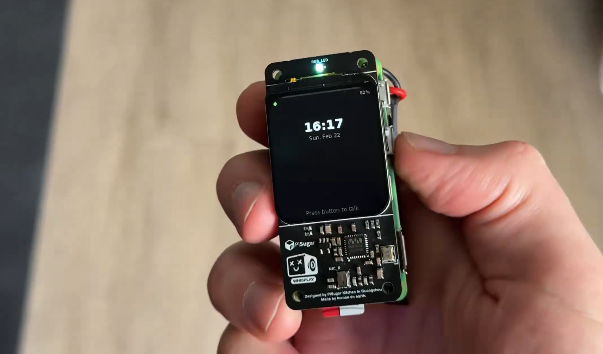
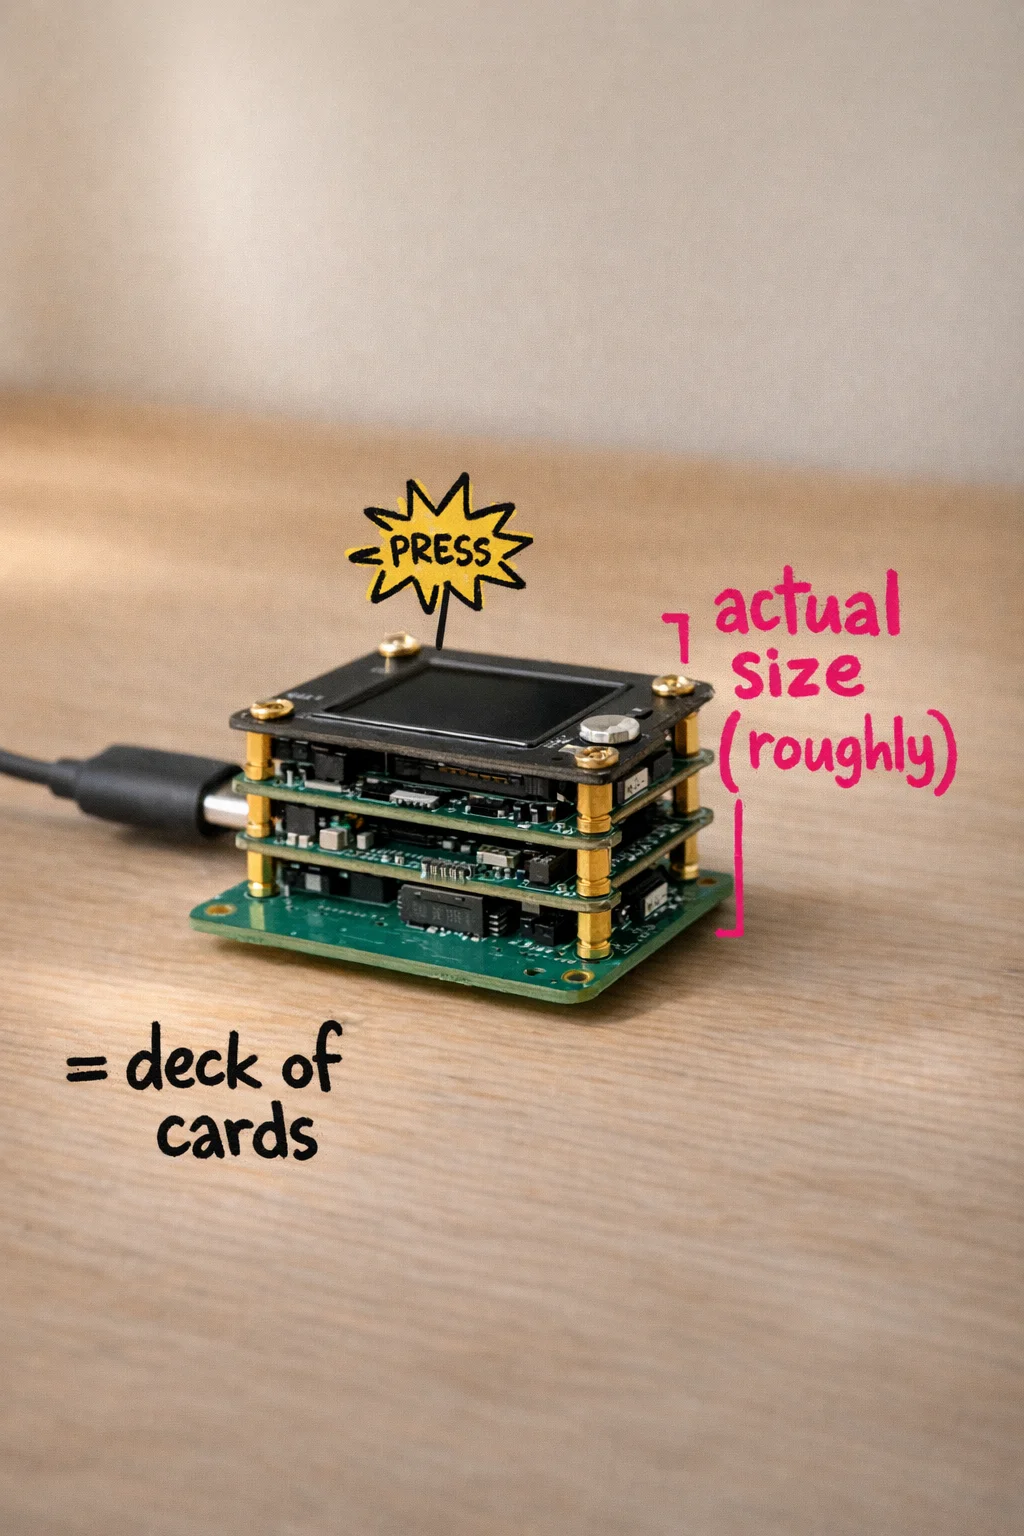
Picture this: a stack of circuit boards about the size of a deck of cards, sitting on your desk. You press a button. You ask it something. It thinks for a second, and then it answers you out loud, in a real voice, like a tiny extremely competent roommate who lives in your pocket and never eats your food.
That is not a concept. That is a thing Sebastian Völkl built, posted about on X, and then put the entire recipe for on GitHub so that people like you and me could build our own.
I know, I know. “Circuit boards” and “GitHub” and “recipe” — you’re already hearing the sound of a thousand Stack Overflow tabs opening and you haven’t even started yet. That’s fair. But here’s what I need you to hear before you close this tab: the total hardware cost is somewhere around $70 [8] [9], the build takes a weekend, and the most technical thing you’ll do is type some commands into a window on your Mac that looks scary but is actually just a very literal text-based to-do list for your computer.
This guide is going to hold your hand through every single step. Not “here’s a general overview, good luck.” EVERY. SINGLE. STEP.
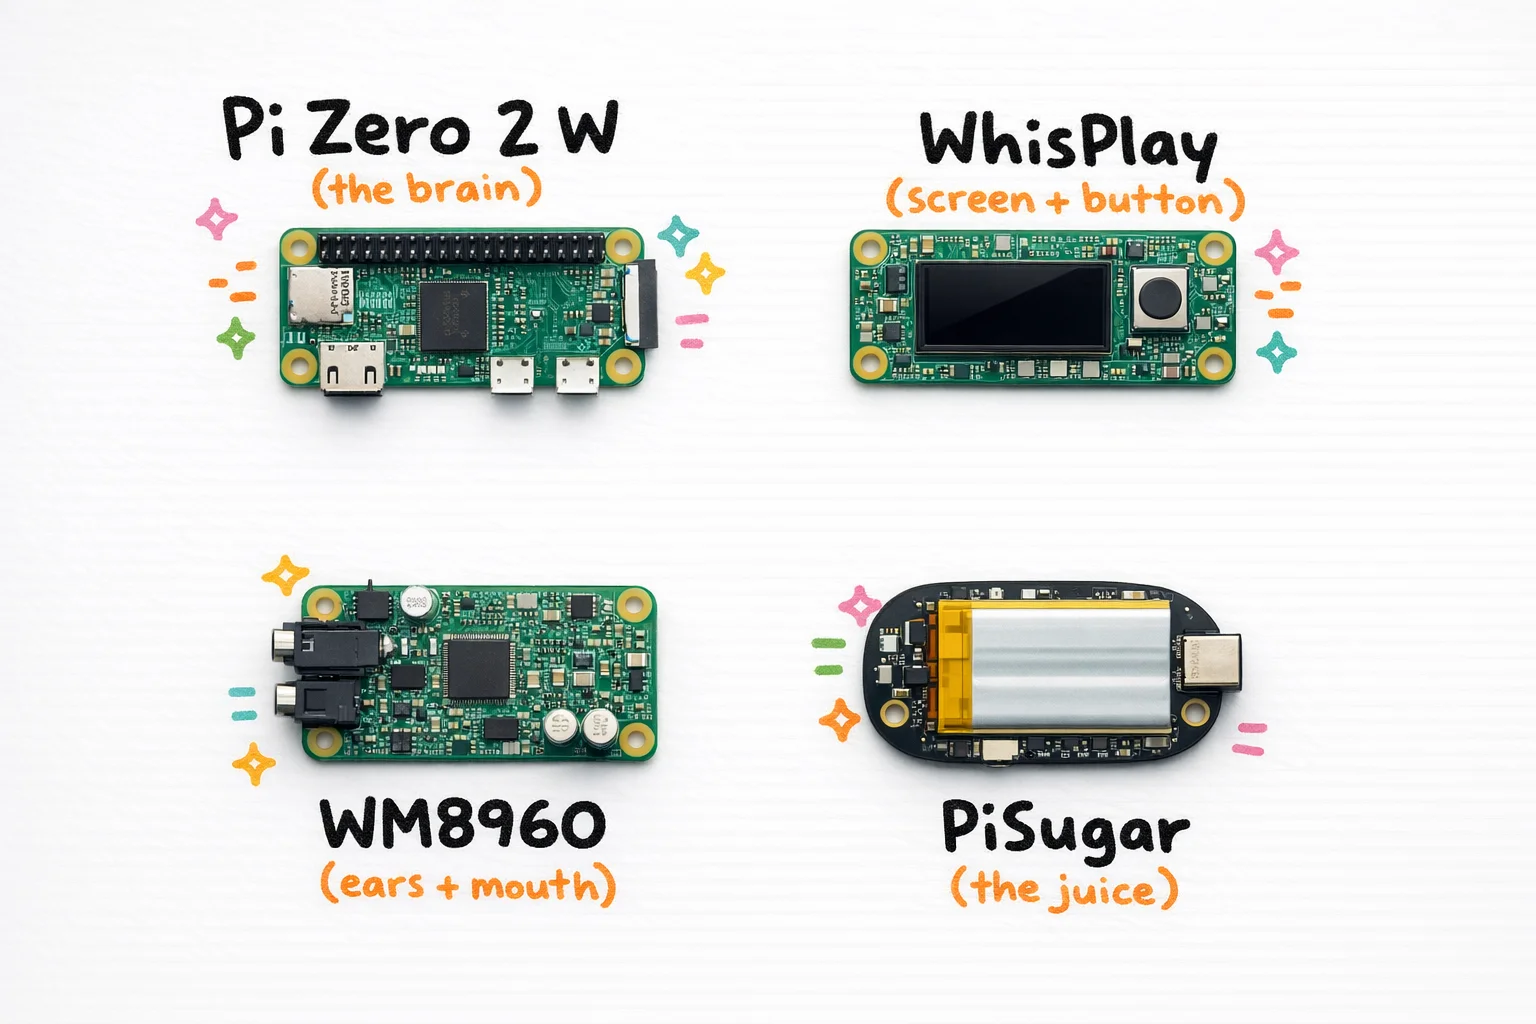
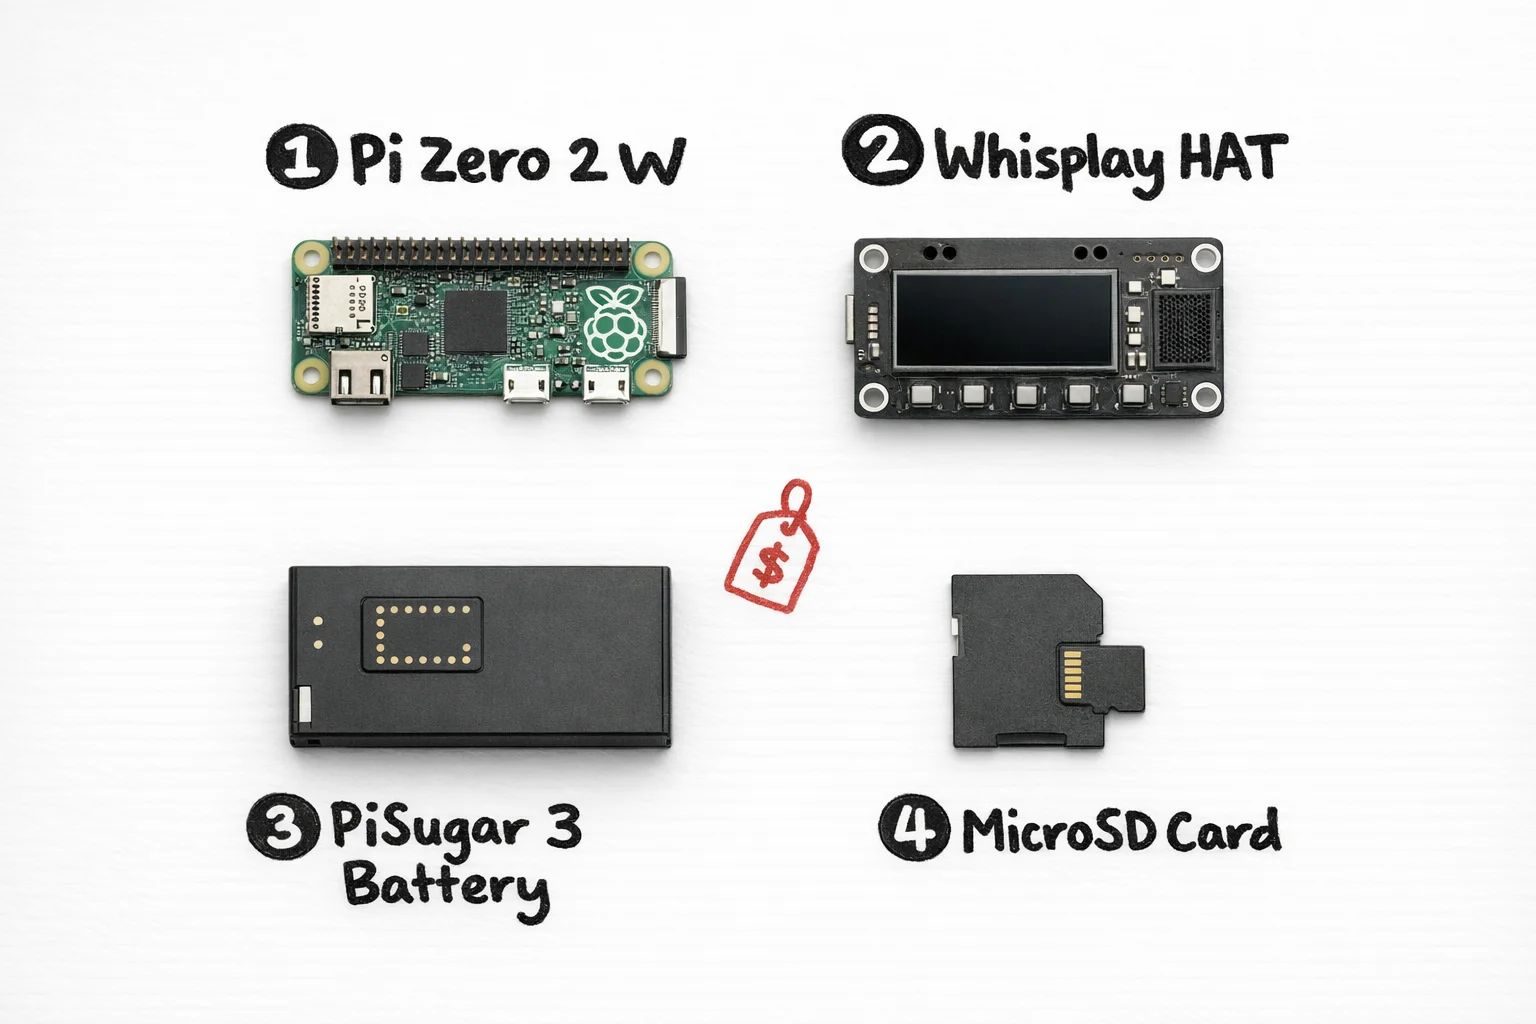
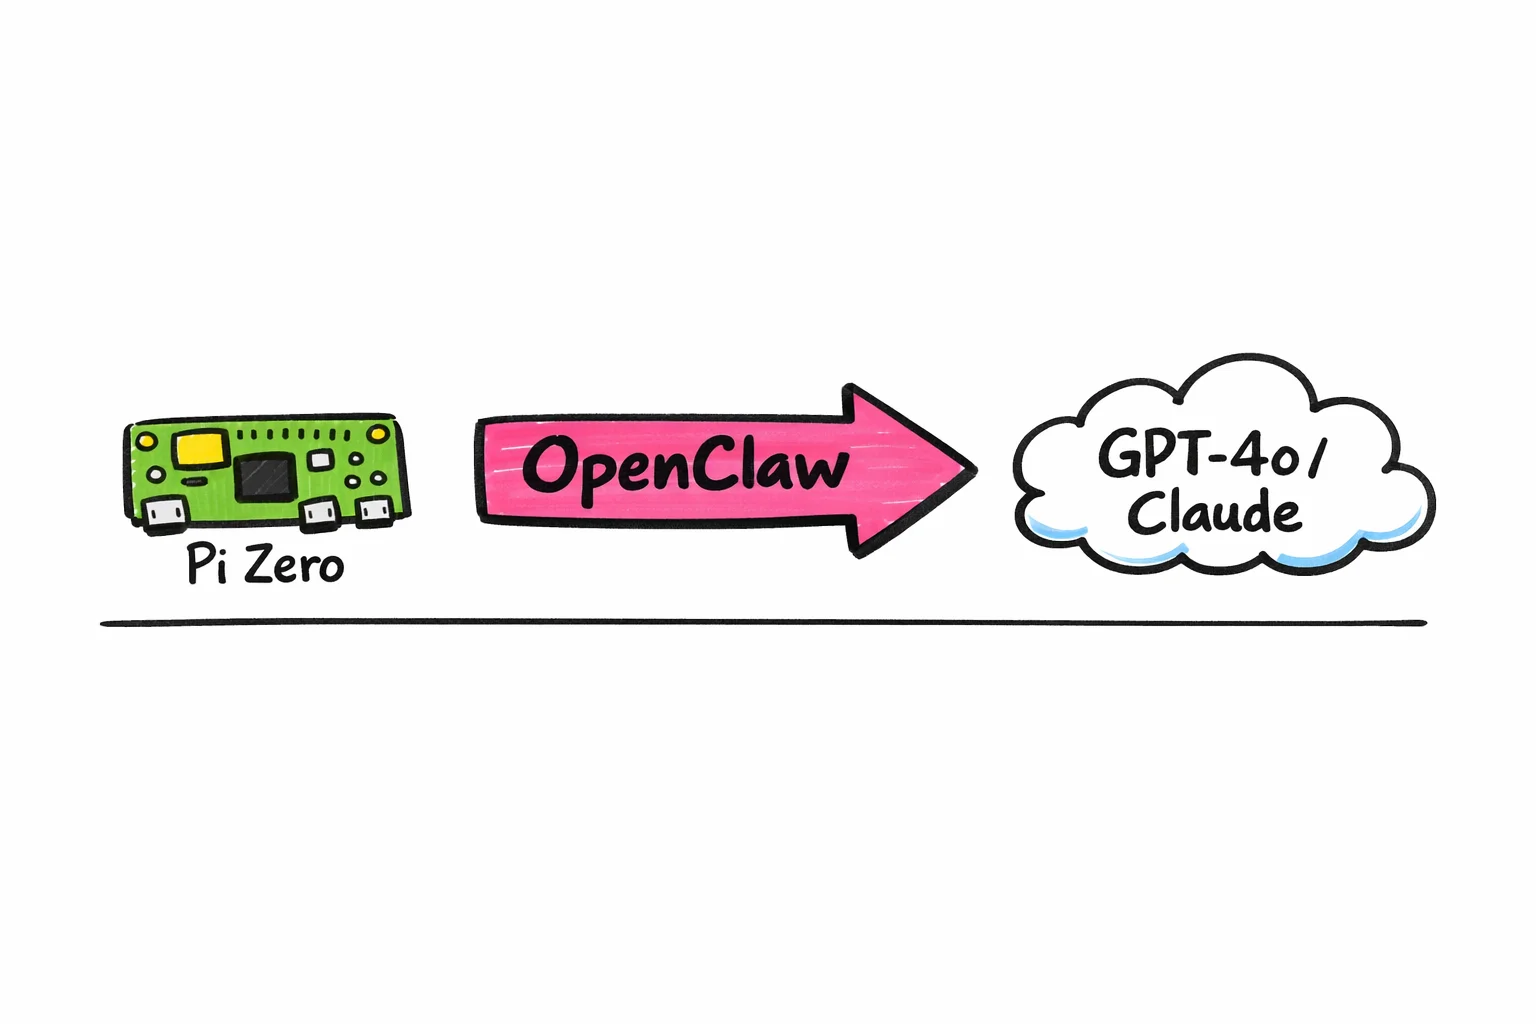
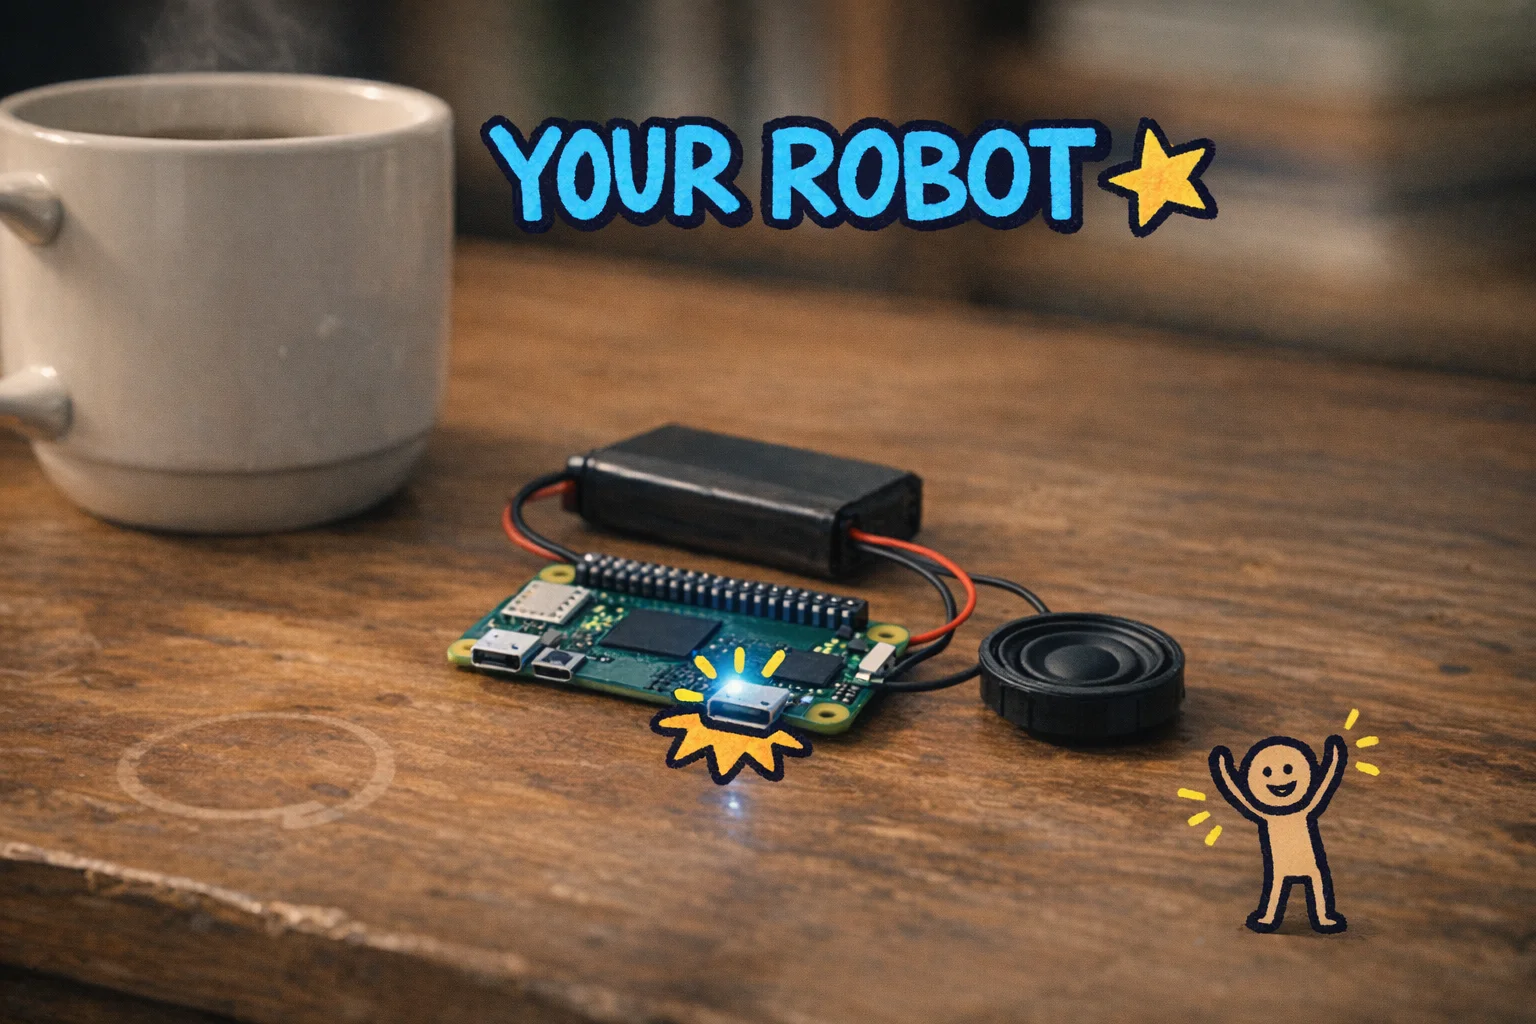
Here’s what you’re actually building: a physical AI assistant that runs on a Raspberry Pi Zero 2 W (a $15 computer the size of a stick of gum) [8], paired with a small screen and button module called WhisPlay, an audio board called the WM8960 for the microphone and speaker, and a PiSugar battery so the whole thing runs untethered [1] [15]. The software brain is OpenClaw, a personal AI assistant framework that connects to real language models like Claude or GPT and runs the whole conversation loop locally on the device [1] [3]. The result is a pocket-sized thing that listens, thinks, and talks back.
One honest note before we go further: this guide is written for Mac users. If you’re on Windows, the underlying ideas are the same but some of the specific commands and tools will differ [11] [12]. We’re not going to cover the Windows path here, mostly because this post is already long enough to be its own small novel.
Here’s the roadmap for what’s ahead. We’ll start with a shopping list and a cost breakdown so you know exactly what to buy and where. Then, before we touch a single command, we’ll spend a few minutes teaching you how to use ChatGPT or Claude as your personal troubleshooting mechanic when something goes sideways (and something will go sideways, because that’s just the deal with hardware projects). After that, we go step by step: flashing the operating system, connecting to the Pi from your Mac, installing OpenClaw, wiring up the hardware, and finally pressing that button and hearing your little $70 Jarvis say something back to you.
You can build this. Let’s go.
Everything you need to buy, explained like you’re a human being
Good news: this build has exactly four main components. Bad news: two of them have shipping times that will test your patience, so read this section before you click anything.
Here is the complete shopping list, with prices as of the time of writing. Prices shift, stock disappears, and promotions come and go, so verify each one before you check out. [1] [18] [21] [27]
| Part | What it actually does | Price (approx.) | Where to buy | Shipping note |
|---|---|---|---|---|
| Raspberry Pi Zero 2 W | The brain — a tiny $15 computer that runs the whole show | ~$15 | Raspberry Pi Store / Rokland / PiShop (with headers) | Usually in stock; Rokland had free US shipping at time of writing [21] |
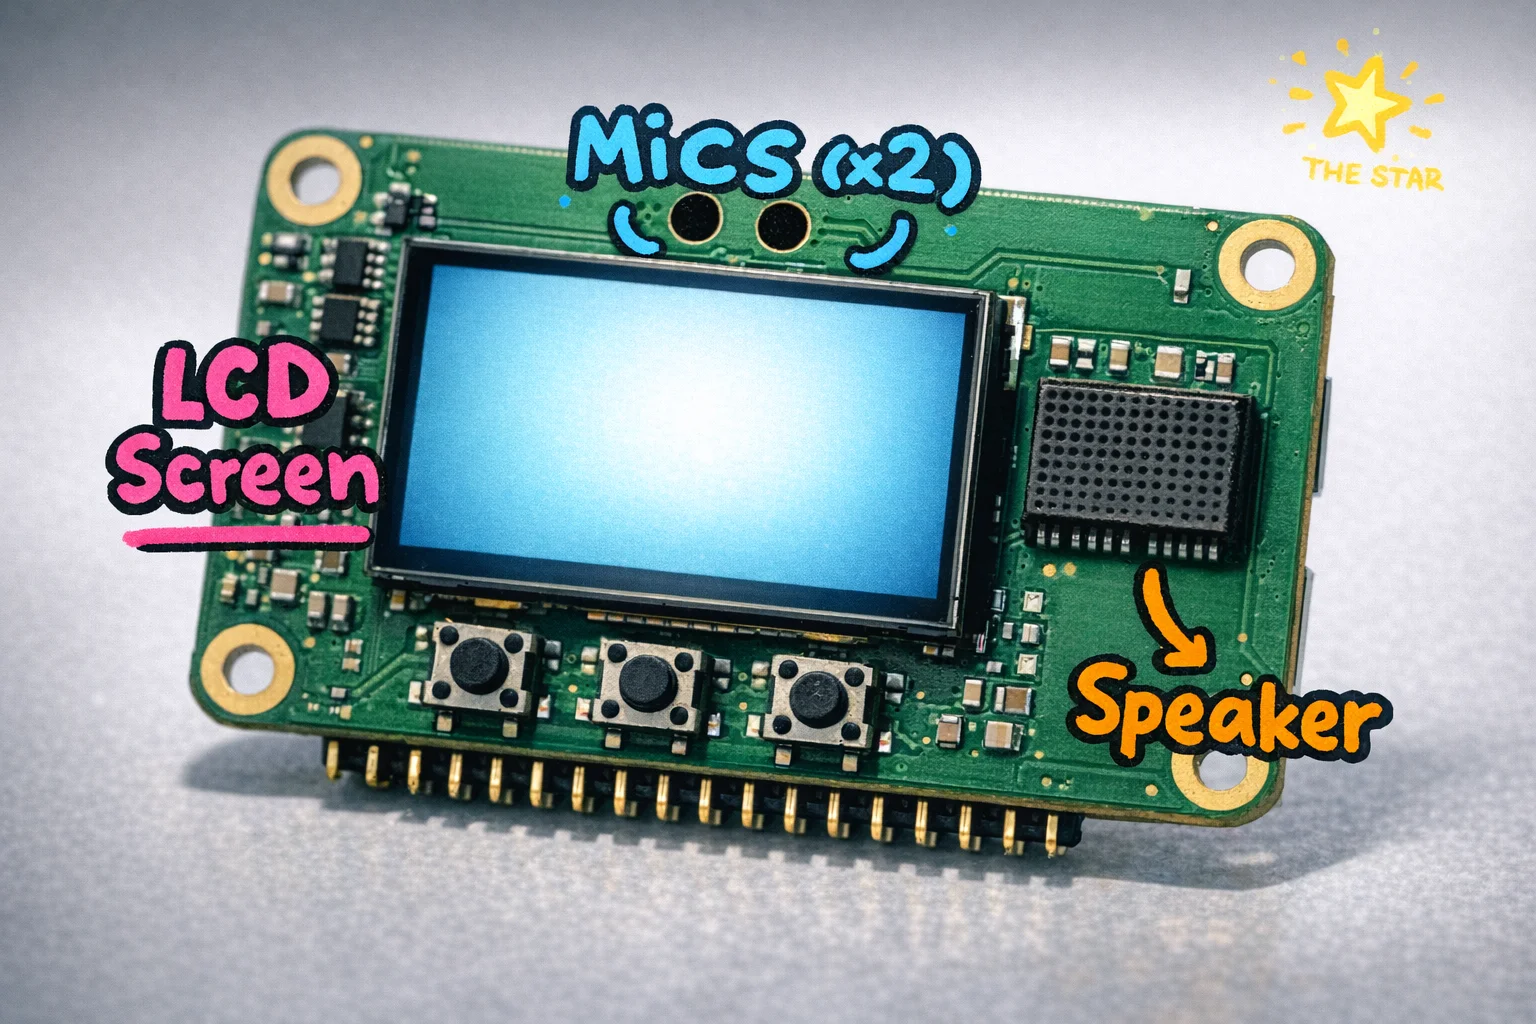
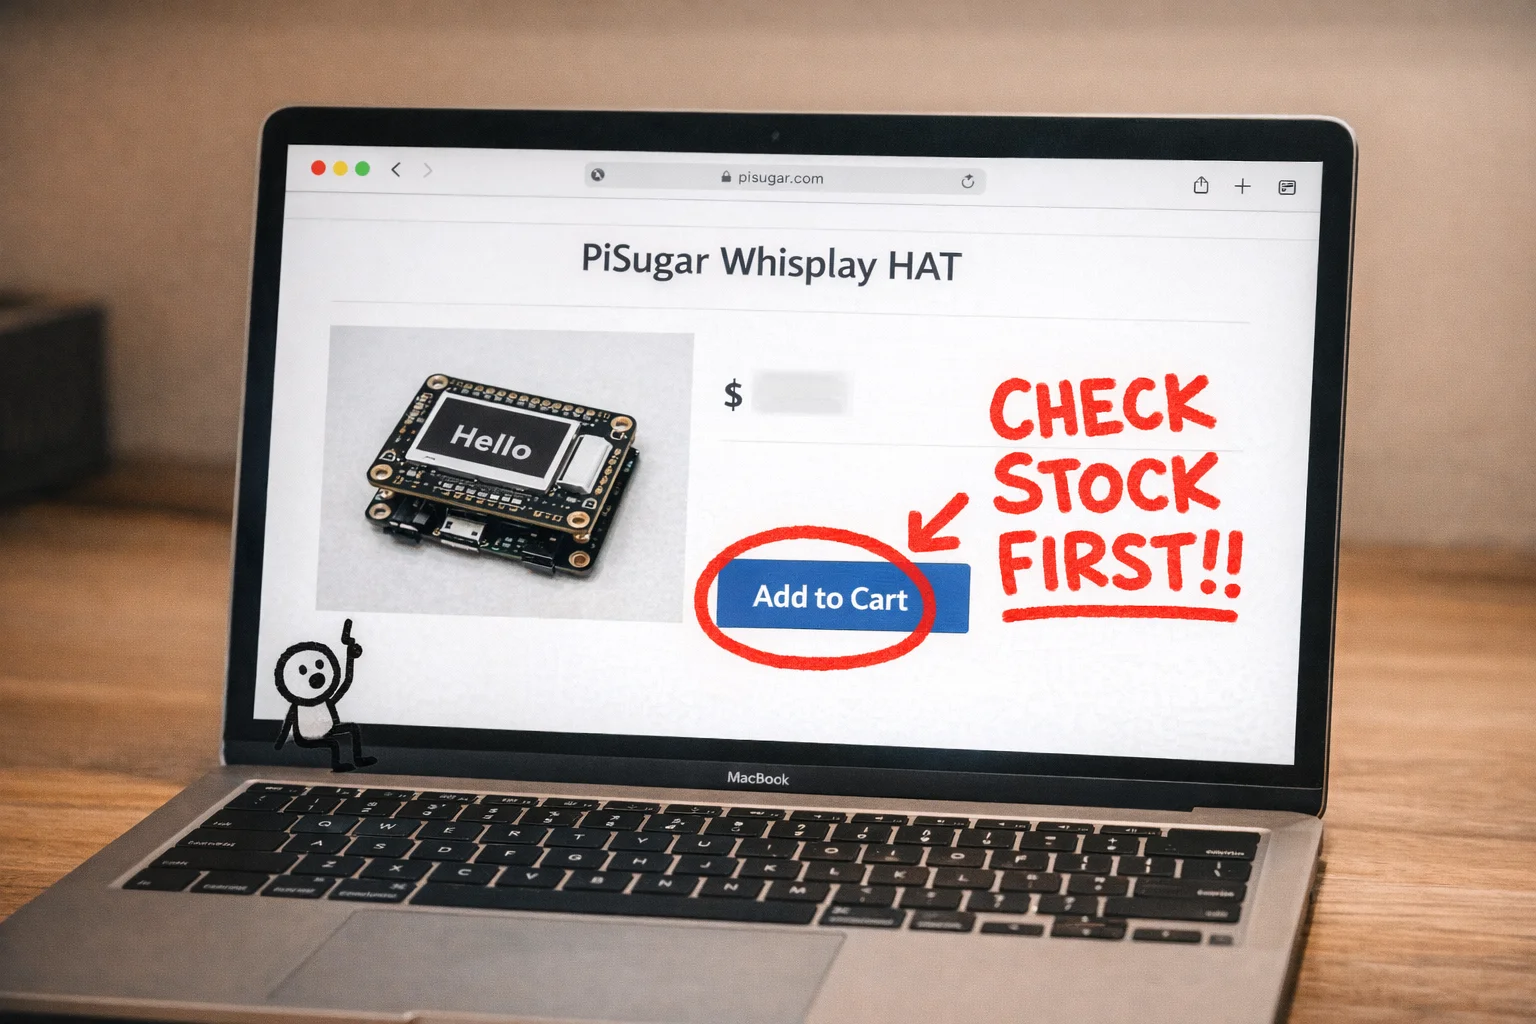
| PiSugar Whisplay HAT | The face and ears — a screen, two microphones, a speaker, and buttons, all in one board that snaps onto the Pi | ~$35.99 | PiSugar store / Tindie | ORDER THIS FIRST. PiSugar’s own docs listed it as “under development” at one point, and availability has been inconsistent across retailers [18] [19] [20] |
| PiSugar 3 battery (1200 mAh) | The power source — clips onto the back of the Pi with pogo pins, no soldering, and keeps everything running untethered | ~$19.90 | PiSugar store | Usually ships within a week [27] |
| MicroSD card (32GB or 64GB, Class 10) | The hard drive — this is where the operating system and all the software live | ~$8–12 | Amazon, Best Buy, any electronics retailer | Same-day pickup at most stores |
Total: roughly $70–80 depending on where you buy and what shipping costs you.
A few things worth knowing before you start clicking “add to cart”:
The Pi Zero 2 W comes in two versions: with headers (the little metal pins already soldered on) and without. Get the one WITH headers, or “WH” version. [23] The Whisplay HAT connects to those pins. Without them, you are doing soldering, and this tutorial is not that tutorial.
The Whisplay HAT is the part most likely to cause you grief on availability. PiSugar’s official documentation flagged it as still in development at one point, while some retailers list it as available. [18] [19] Check the PiSugar store directly, check Tindie, and if neither has stock, check the GitHub repo for any notes Sebastian may have added about alternatives. [16]
You do not need a monitor, keyboard, or mouse for this build. You will set everything up from your Mac, which is one of the genuinely pleasant surprises of this project.
One more thing: verify the exact part numbers and any BOM updates directly in the repository at github.com/sebastianvkl/pizero-openclaw before ordering. [16] Sebastian may have updated the hardware list since this was written, and his repo is the authoritative source.
You now have a mechanic on call 24/7. Here’s how to use them.
Before we touch a single wire, we need to talk about what happens when you get stuck. Because you might. Not because you’re bad at this, but because computers are, at their core, extremely literal little gremlins who will throw a tantrum over a single missing quotation mark. This is not a you problem. This is a them problem.
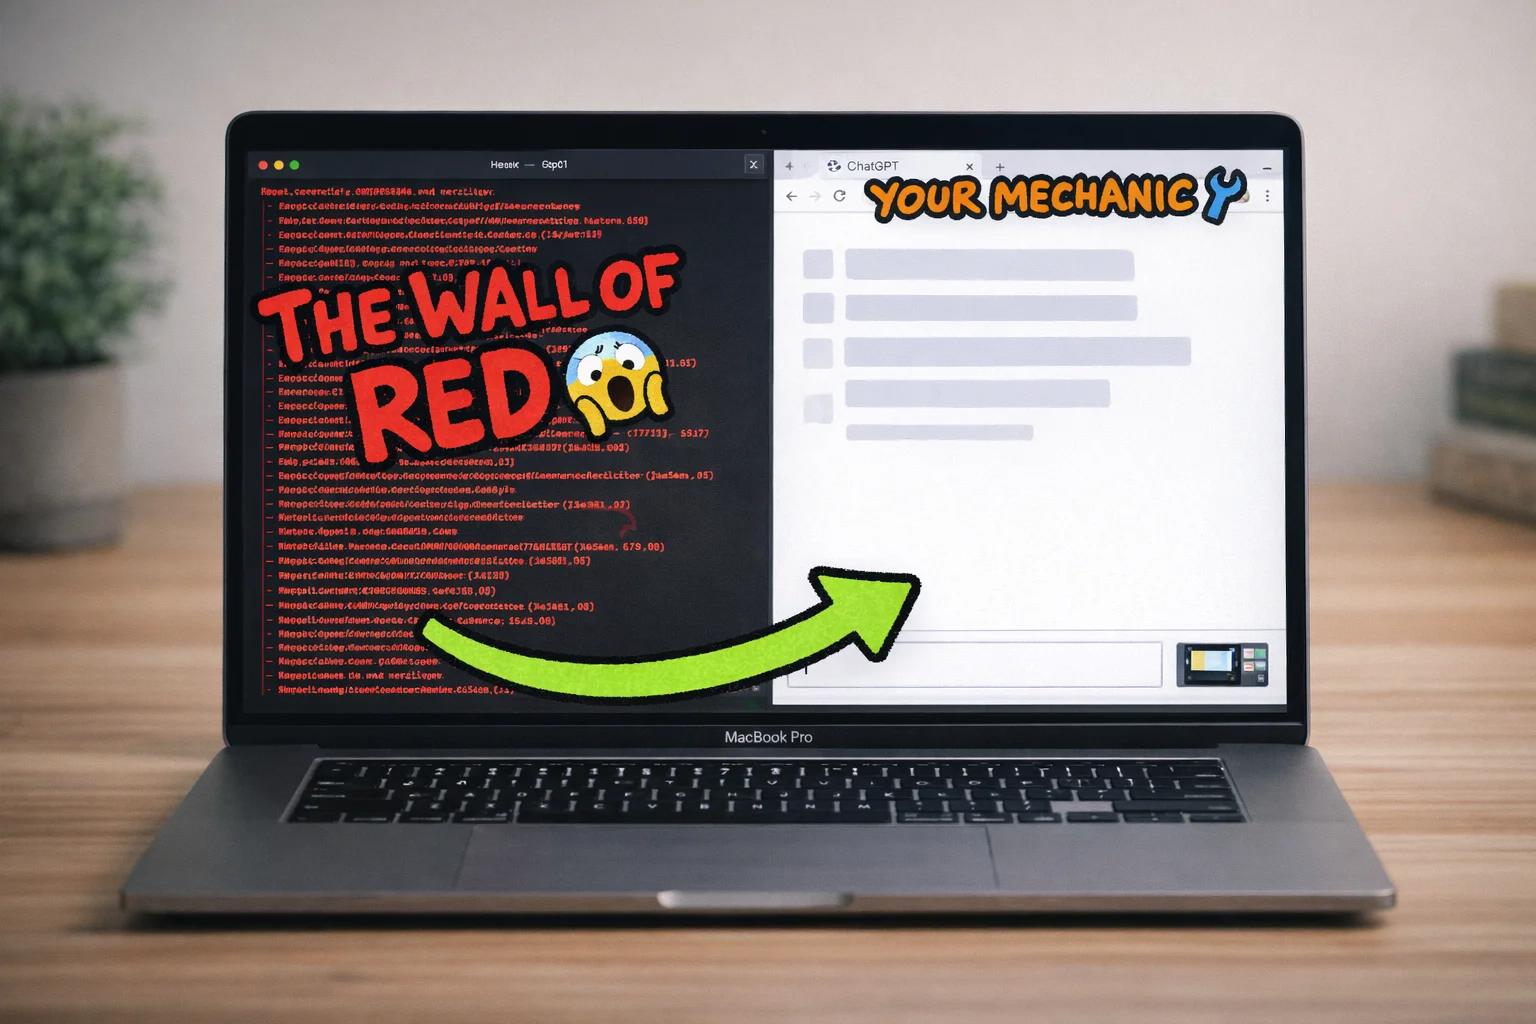
Here’s the good news: you have access to something that has read every Stack Overflow post, every GitHub issue thread, and every “why is my Raspberry Pi not booting” forum post ever written. ChatGPT and Claude both accept images and URLs as context, which means you can show them exactly what’s going wrong on your screen and they will, with genuinely impressive reliability, tell you what to do next. [31] [32] [35]
This is your troubleshooting protocol. Three steps, every time.
Step one: give it context. Paste the link to this post and the link to the repo (https://github.com/sebastianvkl/pizero-openclaw) directly into the chat. ChatGPT can browse URLs and pull in the relevant details. [34] [35] This means it knows what project you’re building, what the files are supposed to look like, and what step you’re on. You’re not explaining from scratch. You’re briefing a mechanic who already knows the car.
Step two: describe the gap. Tell it the step number you’re on, what you did, what you expected to happen, and what actually happened instead. “I’m on Step 12, I ran the install command, it was supposed to say ‘installation complete’ but instead I got a wall of red text” is a perfect bug report. Vague is the enemy here. Specific is your friend.
Step three: show your screen. This is where the magic is. Take a screenshot of your Terminal window and drop it into the chat. ChatGPT and Claude can read terminal output from a screenshot and spot the problem immediately. [32] [35]
Now, two quick things you may need to know before any of that is useful.
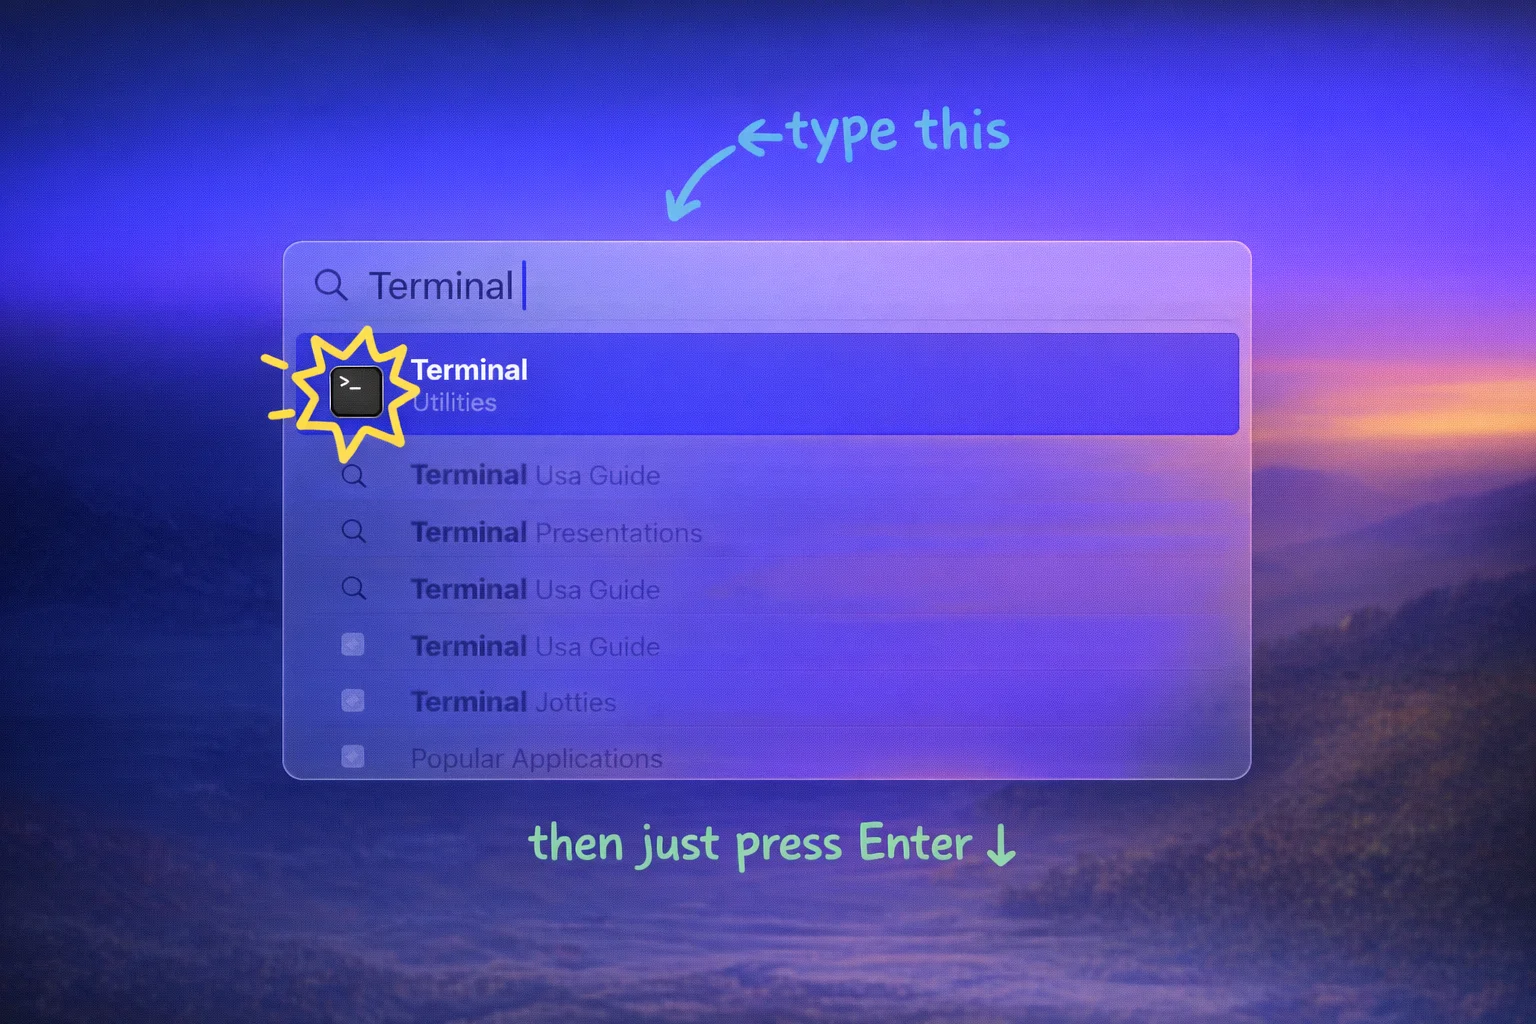
What Terminal is: Terminal is a Mac app that lets you type commands directly to your computer, bypassing all the buttons and menus. It looks intimidating (black window, blinking cursor, no hand-holding whatsoever) but it’s just a text interface. You type a command, press Enter, something happens. That’s it. To open it: press Command + Space, type “Terminal”, press Enter. [39] [40] Done.
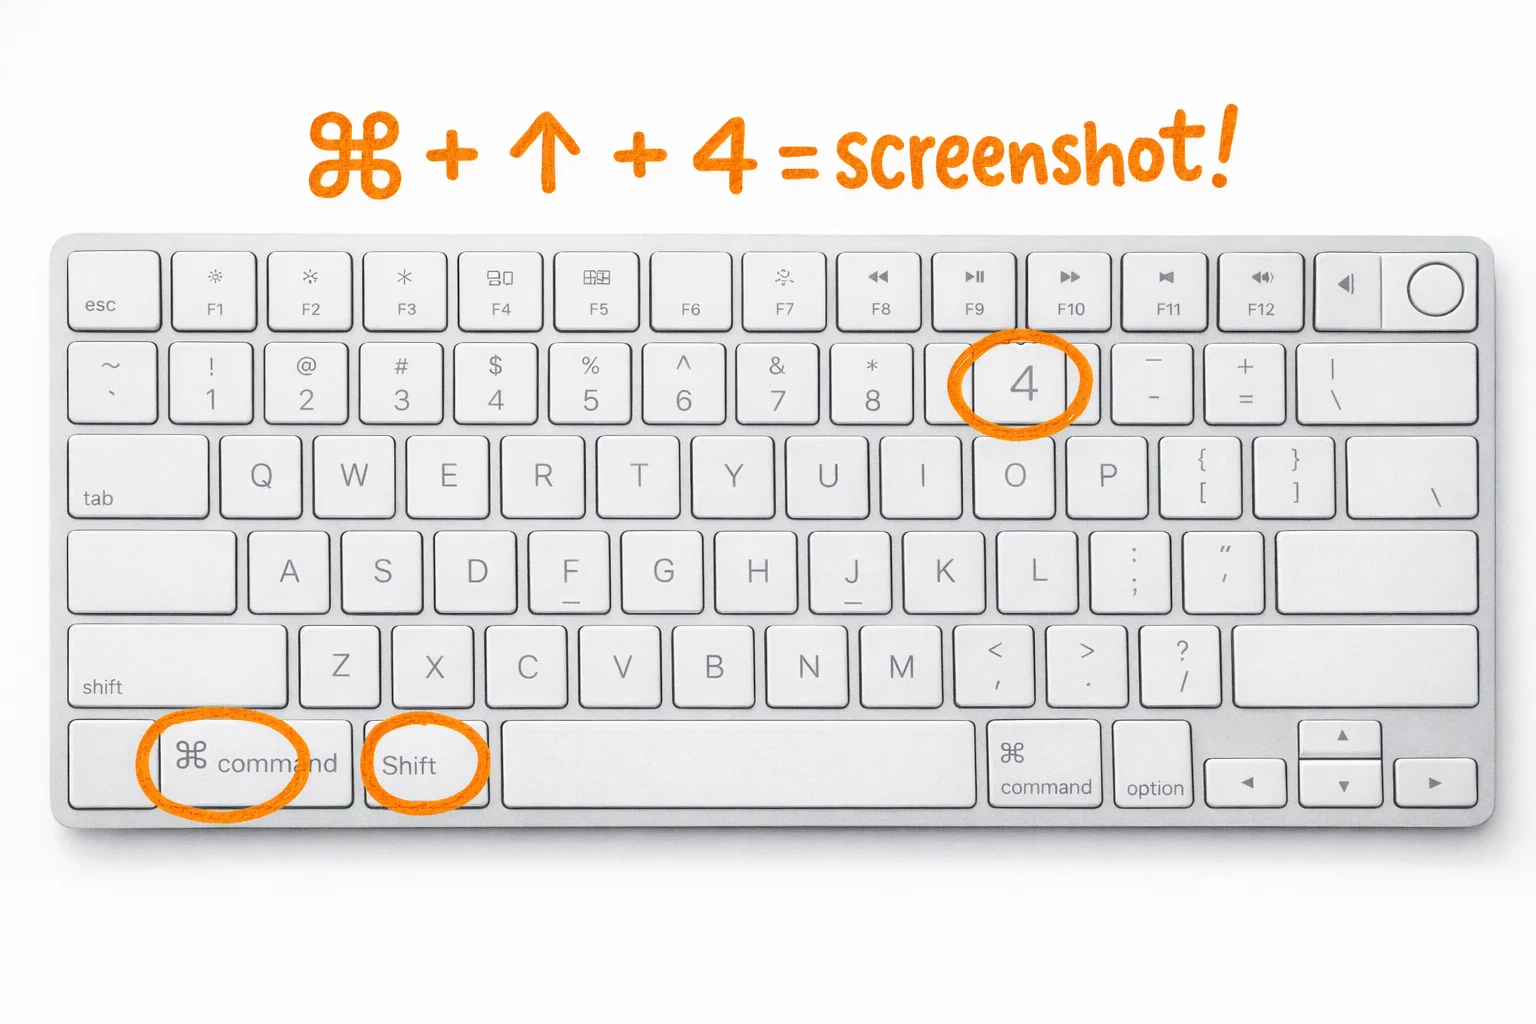
How to take a screenshot: Press Command + Shift + 4, then drag to select the area of your screen you want to capture. The file saves automatically to your Desktop as a PNG. [36] [37] If you want to copy it straight to your clipboard instead (so you can paste it directly into ChatGPT), add Control to that shortcut: Command + Shift + Control + 4. [36] [38]
One honest caveat: ChatGPT’s image analysis occasionally refuses to engage with certain screenshots, and the browsing features that let it read URLs are on paid tiers (ChatGPT Plus). [33] [34] Claude handles images well too and is a solid backup. [32] If one of them gives you a non-answer, try the other.
The three most common places people get stuck in this build, based on the repo’s setup files, are a missing or misconfigured .env file, a systemd service that won’t start, and audio hardware that isn’t being detected. [41] [42] [43] When any of those happen, you now know exactly what to do.
Phase 1: Let’s Put a Brain in This Thing
Here’s the good news: you will never plug a keyboard or monitor into your Raspberry Pi. Not once. The entire setup happens from your Mac, invisibly, before the Pi even boots for the first time. It’s a little like performing surgery on a patient who doesn’t know they’re a patient yet.
The tool that makes this possible is called Raspberry Pi Imager, and it’s free, it’s official, and it works exactly like installing any other Mac app. Go to raspberrypi.com/software [52], download the DMG (it supports macOS 11 and later, both Intel and Apple Silicon [52] [53]), drag it to your Applications folder, and open it. That’s step one. You did step one.

Step 2: Pick your OS. When Sebastian’s repo [16] says to check the README for the exact image, it means it. Do that before you flash anything. That said, the general guidance for OpenClaw on a Pi is Raspberry Pi OS Lite, 64-bit [49] [50] — “Lite” because you don’t need a desktop interface on a device with no screen, and 64-bit because that’s what the software expects. In Imager, select “Raspberry Pi Zero 2 W” as your device, then choose “Raspberry Pi OS (other)” to find the Lite 64-bit option.
Step 3: The magic gear icon. Before you hit flash, click the little settings icon (it looks like a gear or a pencil depending on your version). This is where the whole headless setup lives. [55] [56] You’ll fill in:
- Your hostname (something like
pocketai.local— this is how your Mac will find the Pi) - A username and password you actually remember (the old default “pi” account no longer exists [58] [59] [60], so you MUST create one here)
- Your WiFi network name and password
- Enable SSH — there’s a checkbox, turn it on
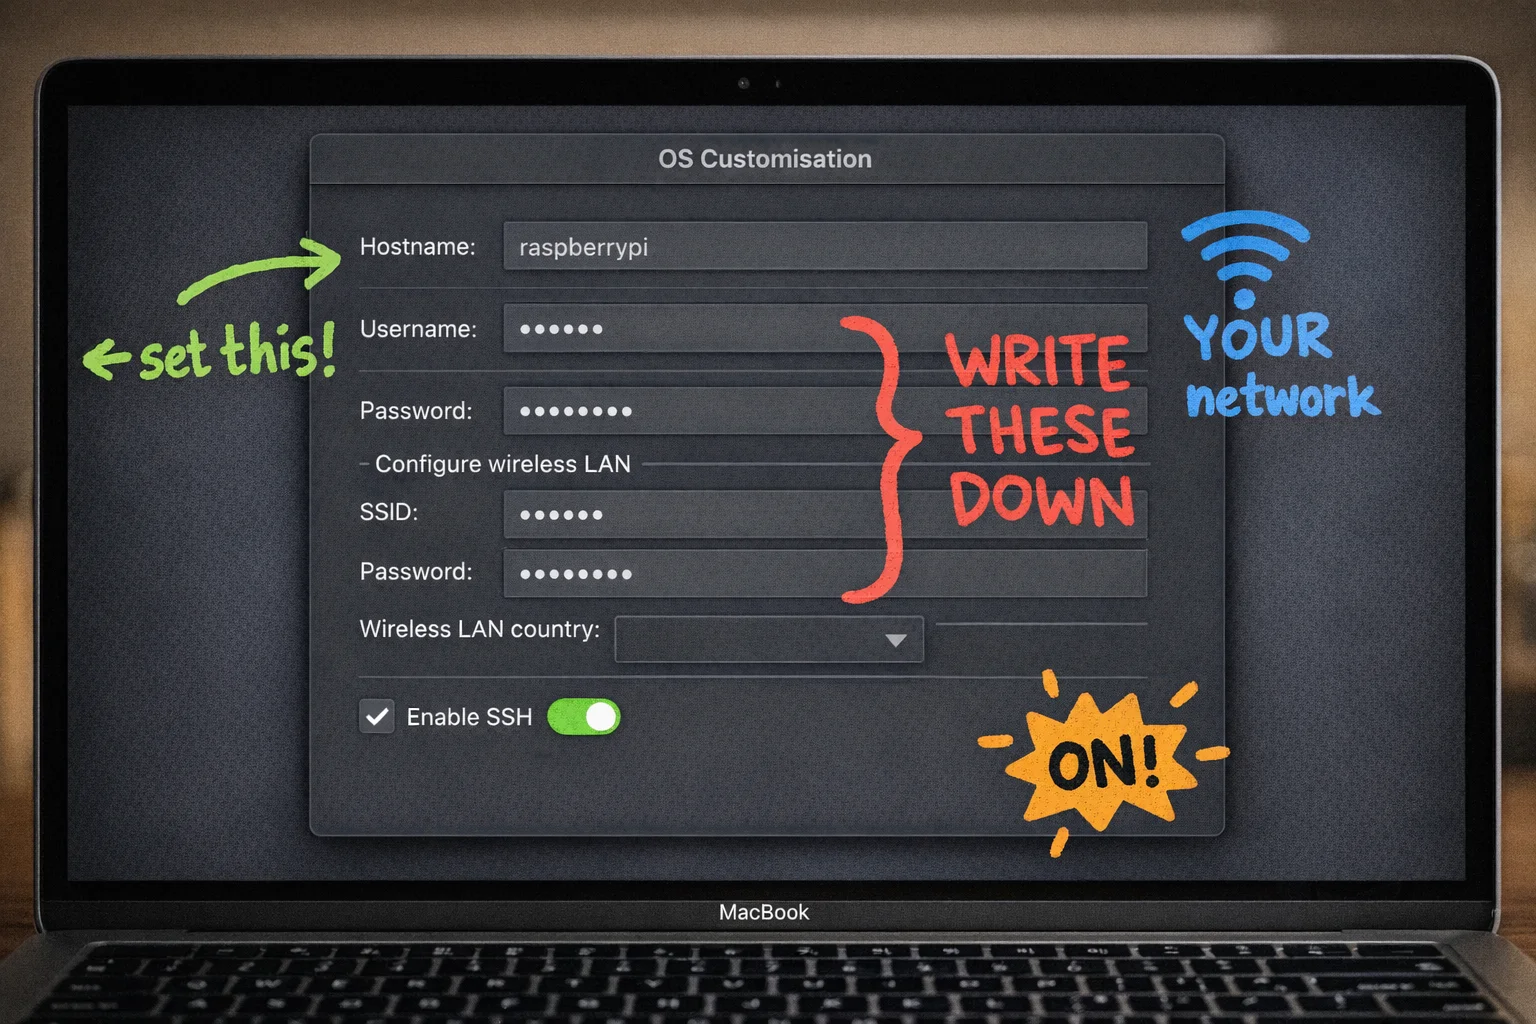
Write down your username and password somewhere. A sticky note is fine. This is not a moment for cleverness.
Step 4: Flash it. Select your microSD card as the storage target, hit Write, confirm you want to erase it, and wait. It takes a few minutes. Go make coffee. Come back.
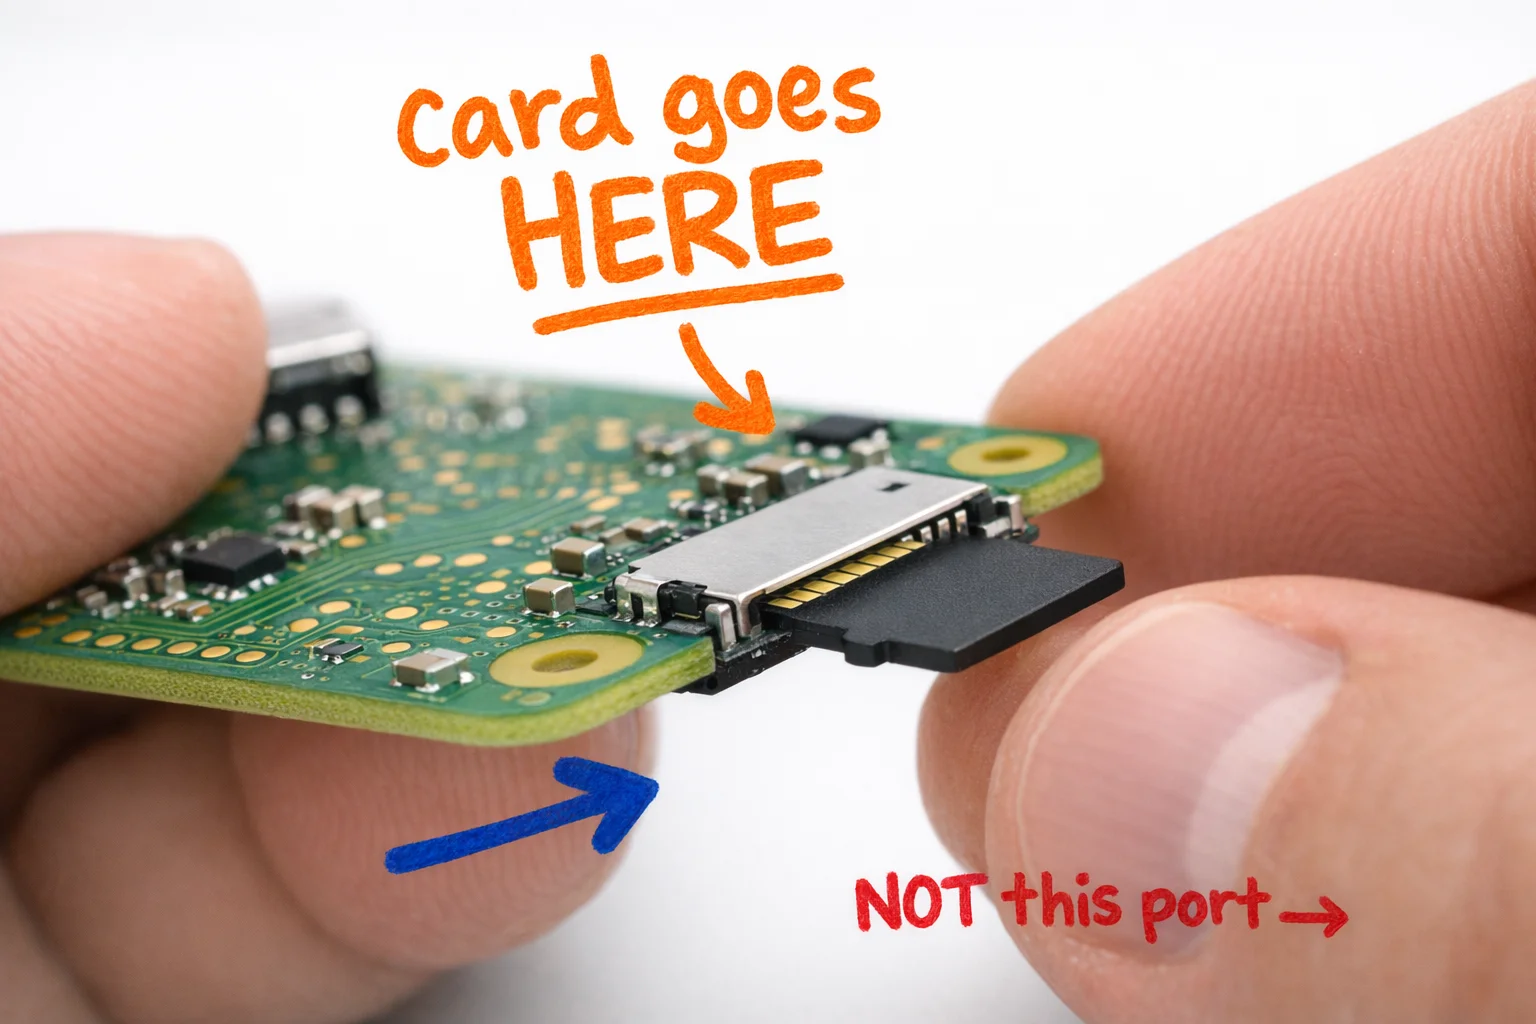
Step 5: Insert and power on. Pop the card into your Pi Zero 2 W, connect power via the micro-USB port labeled “PWR IN” (not the other one), and wait about 90 seconds for it to boot and connect to your WiFi.
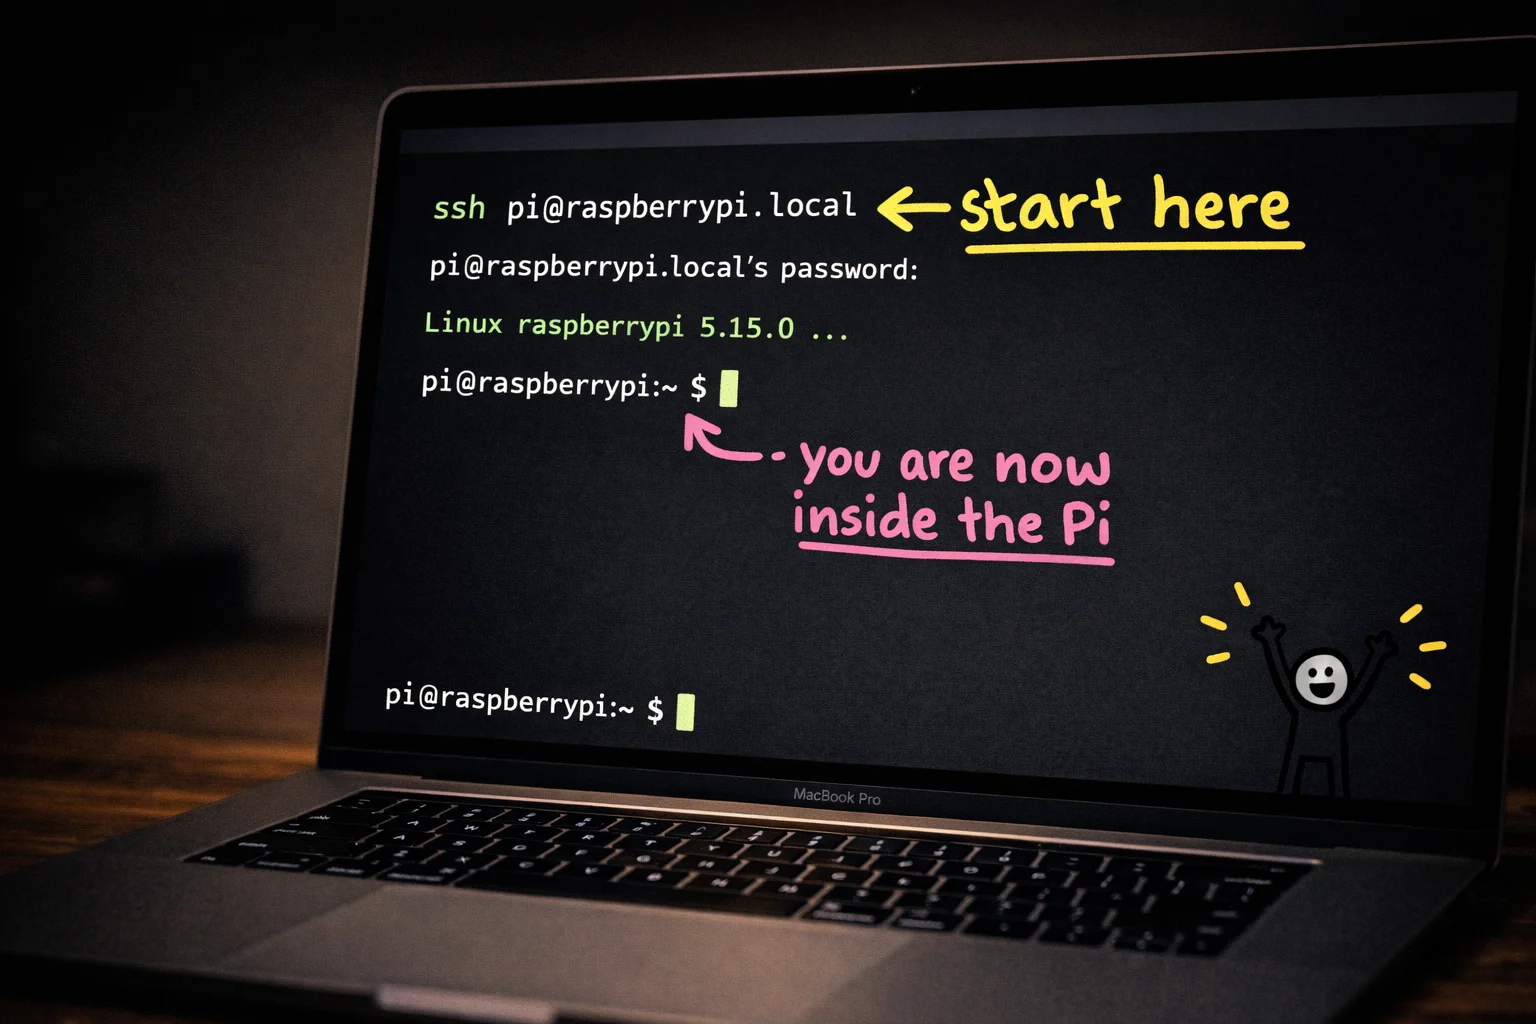
Step 6: SSH in. Open Terminal on your Mac (Spotlight search, type “Terminal”, press Enter [39]). Then type:
ssh yourusername@pocketai.local
Replace yourusername with whatever you set in the Imager. If it asks “are you sure you want to continue connecting?” type yes. Then enter your password.
[Image failed: That blinking cursor on your Pi’s command prompt is the sound of a tiny computer saying ‘hello’ — you just performed remote brain surgery and the patient is awake.]
If pocketai.local doesn’t work, log into your router’s admin page (usually 192.168.1.1 in a browser) and look for a connected device with “raspberry” in the name. Use that IP address instead. [55] [56]
When you see a command prompt with your Pi’s hostname on it, that’s it. You’re in. You are remotely controlling a tiny computer the size of a credit card from your laptop, over WiFi, with no cables attached. That is genuinely cool and you should feel good about it.
Okay, now we teach the Pi to think
Here is the honest truth about Phase 2: it looks scarier than it is. You are going to type some commands that look like someone sneezed on a keyboard, and every single one of them will make sense by the time we are done. Promise.
First, a plain-English explanation of what OpenClaw actually is, because you deserve to know what you are installing before you install it. OpenClaw is an AI agent framework, which is a fancy way of saying it is the software layer that sits between your hardware (the Pi, the microphone, the speaker) and an AI model (from OpenAI or Claude), handles the back-and-forth conversation, manages what tools the AI can use, and keeps everything running as a persistent service rather than a one-shot script you have to babysit. [4] Think of it as the nervous system. The Pi is the body. The AI model is the brain living in the cloud. OpenClaw is the spinal cord connecting them. [5]
Step 1: Clone the repo onto your Pi.
You should still be SSH’d into your Pi from Phase 1. If you closed that Terminal window, go back and re-SSH in (it is just ssh pi@raspberrypi.local again). Then run:
git clone https://github.com/sebastianvkl/pizero-openclaw.git
cd pizero-openclaw
That first command downloads Sebastian’s entire project onto the Pi. The second command steps inside the folder. [10]
Step 2: Set up your environment file.
The repo includes a file called .env.example that lists every variable the software needs to run. [41] You are going to copy it into a real .env file and then fill in your actual keys:
cp .env.example .env
nano .env
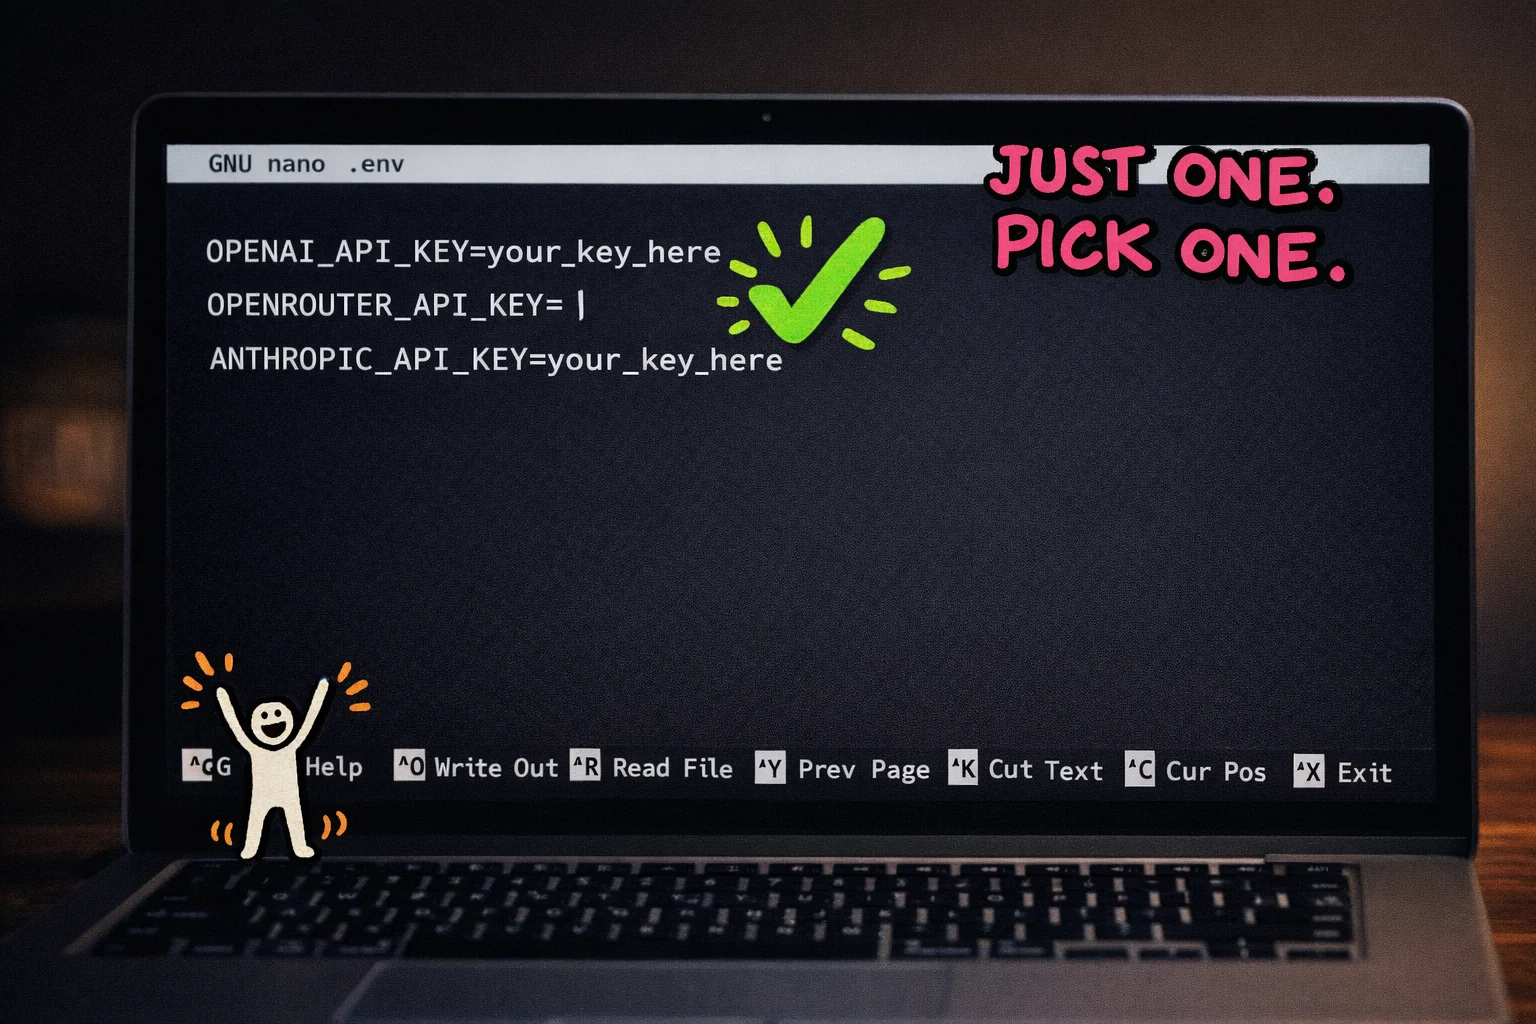
nano is a basic text editor that runs right in Terminal. You will see something like this staring back at you:
OPENAI_API_KEY=your_key_here
OPENROUTER_API_KEY=your_key_here
ANTHROPIC_API_KEY=your_key_here
APIKEY=yourkeyhere
OPENROUTERAPIKEY=yourkeyhere
ANTHROPICAPIKEY=yourkeyhere
You only need to fill in ONE of these, depending on which AI provider you chose. [73] OpenRouter is the easiest starting point because one account gives you access to dozens of models, including GPT-5-mini, which is cheap and fast. [65] [66] Sign up at openrouter.ai, grab your API key, paste it in, then press Ctrl+X, then Y, then Enter to save.
Step 3: Run the install script.
bash install.sh
This pulls in the Python dependencies and sets everything up. Go make a coffee. Seriously. The Pi Zero 2 W is not a speed demon and this will take a few minutes.
Step 4: The Hetzner VPS question.
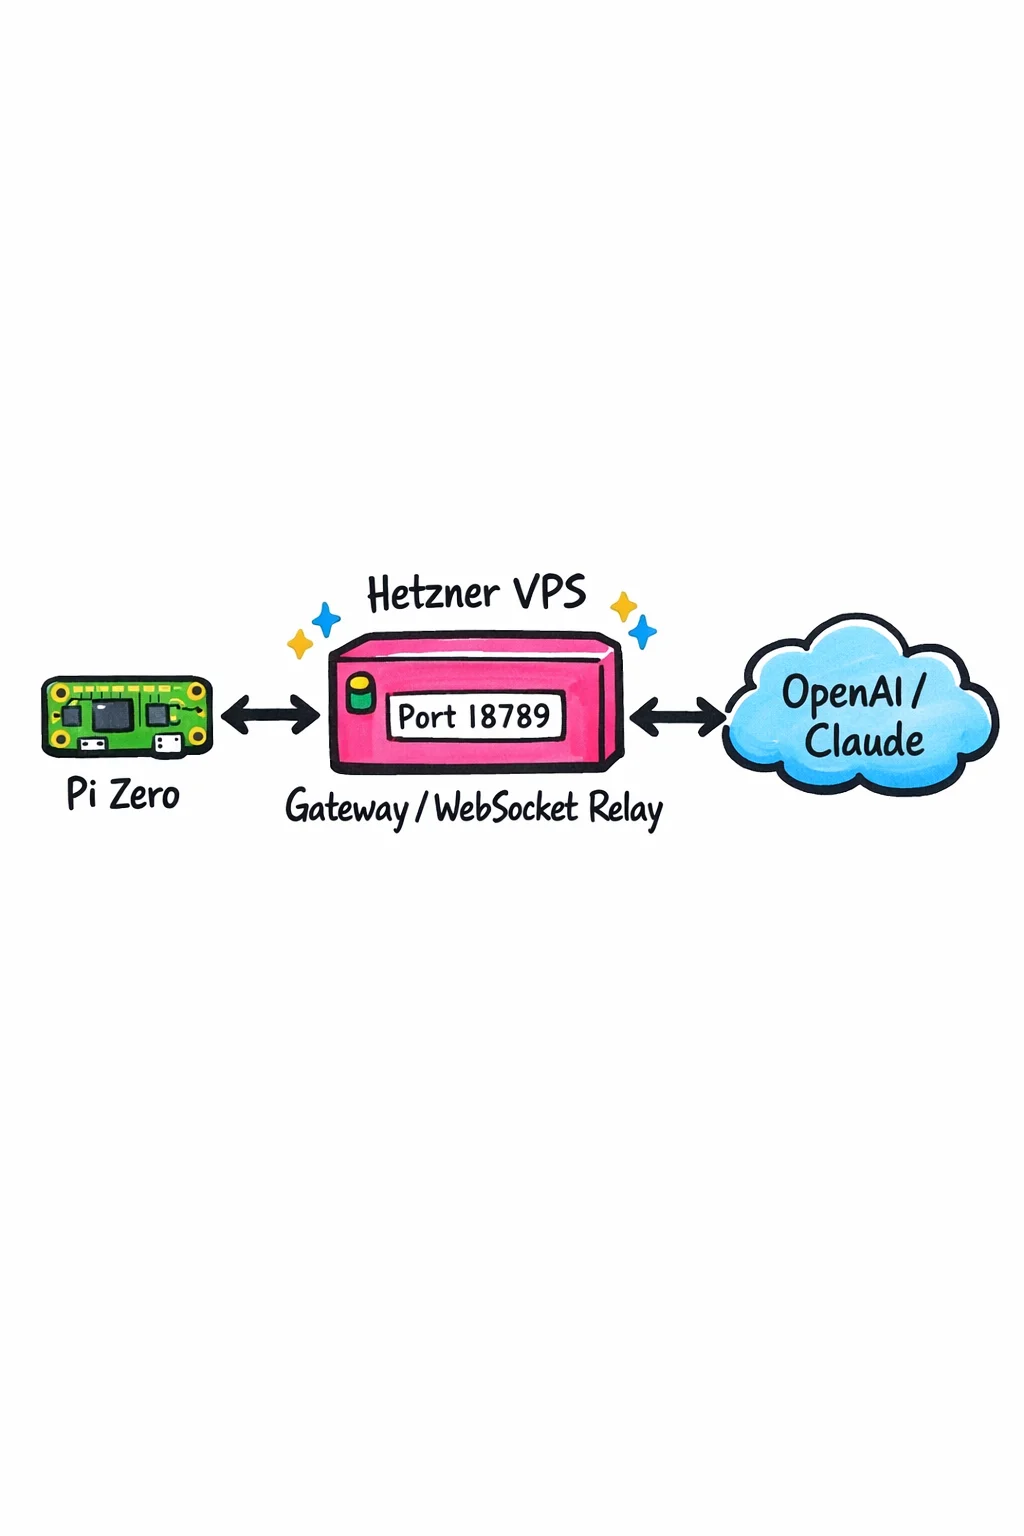
You may have seen “Hetzner” mentioned in the OpenClaw docs and wondered if you need to rent a server. Here is the deal: the Hetzner VPS acts as a persistent Gateway, a always-on WebSocket relay (port 18789) that routes messages between your Pi and the AI backend. [71] [72] It is NOT doing the AI thinking itself. For a basic build, Sebastian’s repo is configured to work without one, but if you want your assistant reachable from anywhere or running 24/7 without keeping the Pi on your home network, a Hetzner CX11 instance runs about $4/month. [98] Not required to get started. Required to feel like a proper Bond villain.
Step 5: Enable the service so it starts on boot.
sudo cp pizero-openclaw.service /etc/systemd/system/
sudo systemctl enable pizero-openclaw
sudo systemctl start pizero-openclaw
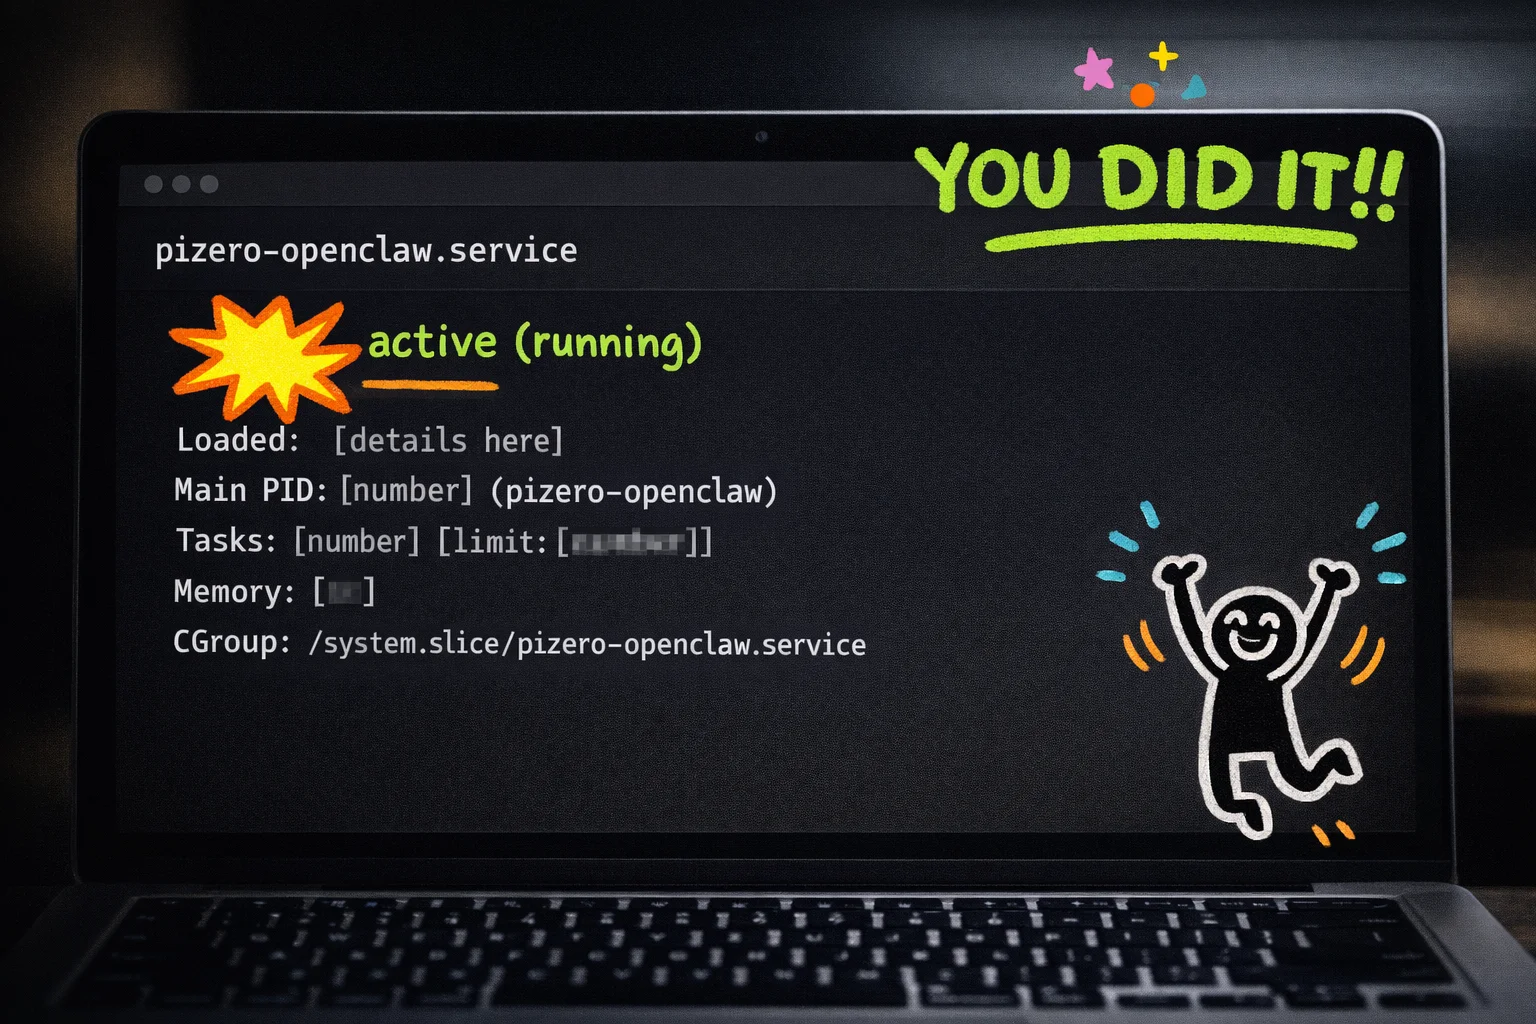
That .service file is already in the repo. [42] These three commands install it as a background service, tell the Pi to start it automatically every time it boots, and start it right now without waiting for a reboot. Run sudo systemctl status pizero-openclaw and if you see “active (running)” in green, you just gave your Pi a brain.
This Is the Part Where You Actually Build the Thing
Okay. You have a Pi with an OS on it. You have a pile of small green circuit boards in front of you. This is the part that feels like surgery but is actually closer to snapping together LEGO — just LEGO that costs $70 and has a glass screen that will crack if you look at it wrong.
Clear your desk. Seriously. Put your coffee somewhere it cannot tip. Pick up the Pi Zero 2 W by its edges, like you’re handling a photograph you don’t want fingerprints on.
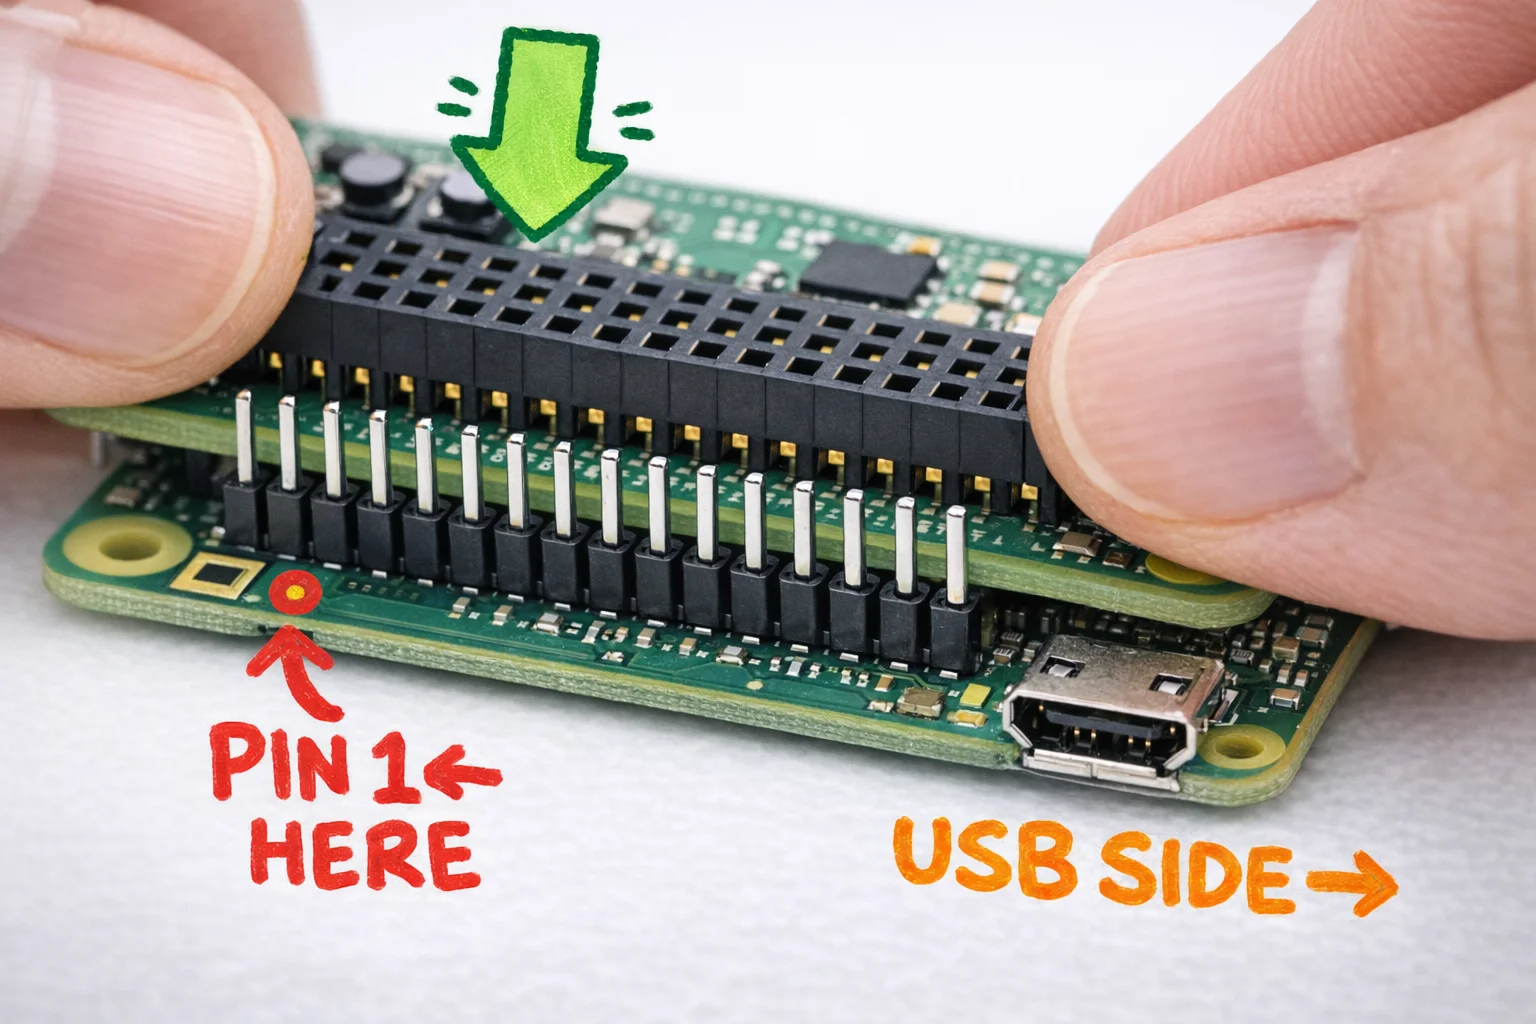
Step 1: Orient the WhisPlay HAT correctly.
The PiSugar WhisPlay HAT connects to your Pi’s 40-pin GPIO header — that’s the two rows of tiny metal pins along one edge of the board. The rule for getting orientation right: the HAT’s button side goes toward the Pi’s USB port side. [18] [19] No soldering, no jumpers, no DIP switches to flip. You’re just pressing two connectors together. [5] Line up the HAT’s female header over the Pi’s pins, confirm pin 1 aligns (it’s the corner pin, usually marked with a small triangle or square pad on the board), and press down firmly and evenly. You’ll feel it seat. [4]
If your kit came with nylon standoff screws, thread them through the mounting holes at the corners. They keep the HAT from flexing and putting stress on the connector. Do not overtighten — nylon strips easily and you are not building a submarine.
Step 2: Attach the PiSugar battery.
The battery connects via pogo pins — little spring-loaded contacts on the underside of the Pi that press against pads on the battery board. No wires. You just clip or slide the battery onto the bottom of the Pi. [6] If the battery status isn’t reading correctly later, the fix is usually cleaning those pads with a dry cloth and reseating. The PiSugar Power Manager software (which you’ll install shortly) can display battery level right on the WhisPlay screen. [6]

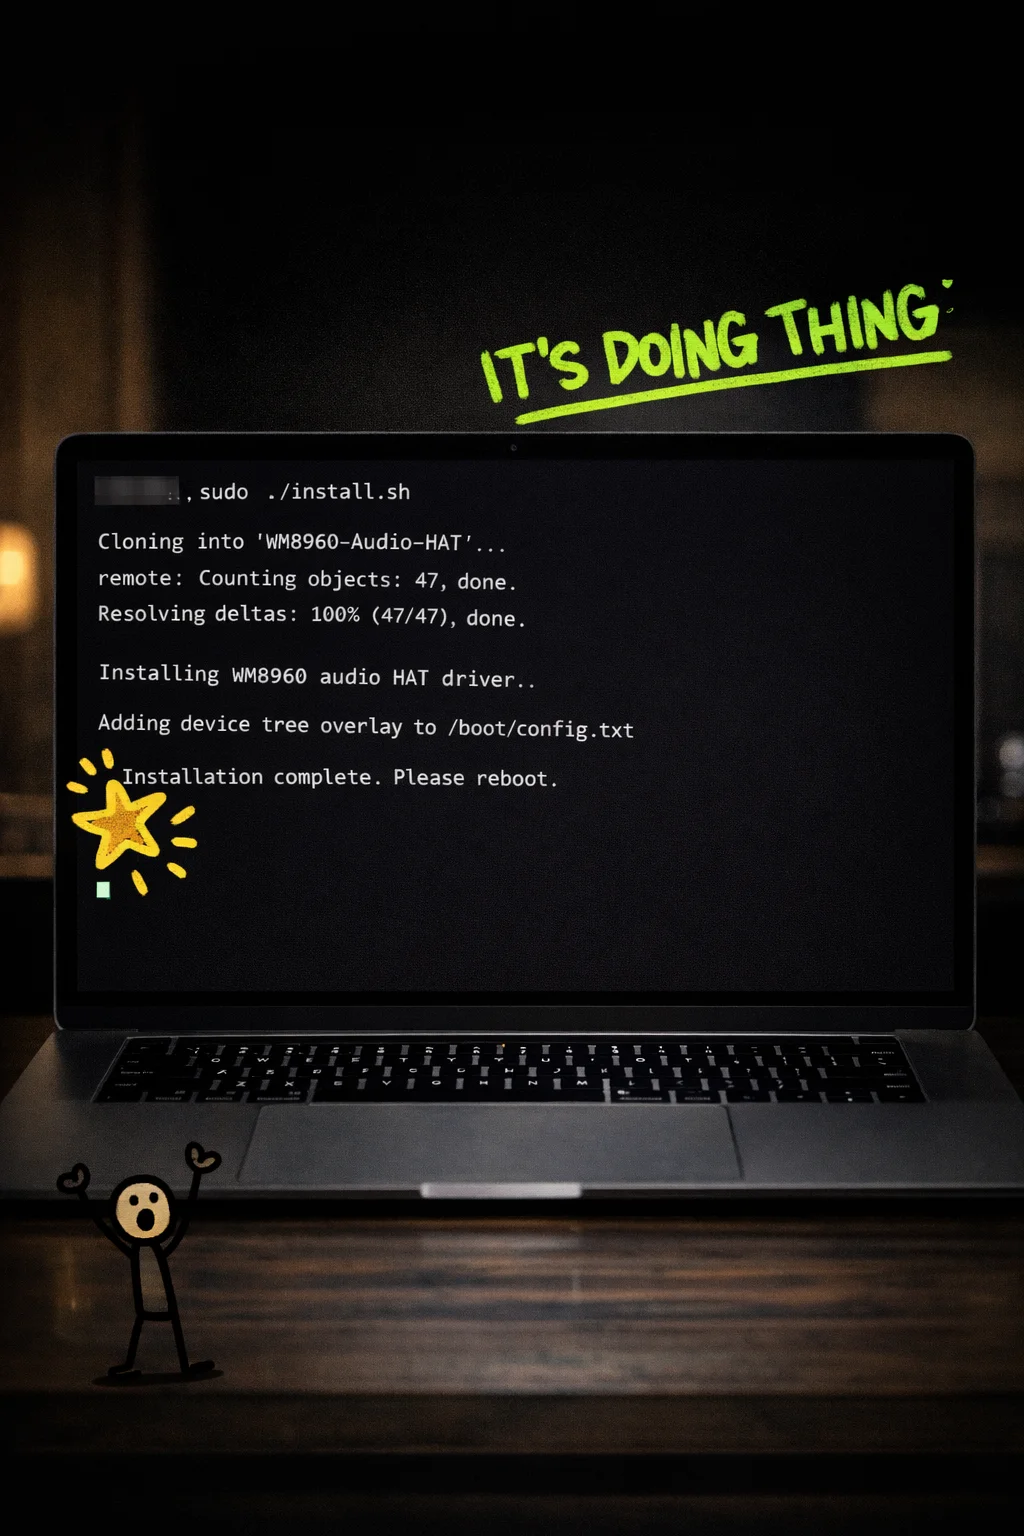
Step 3: Install the WM8960 audio drivers.
Here’s where you go back to your SSH terminal. The WM8960 audio HAT — which is built INTO the WhisPlay, so you don’t have a separate board to attach — needs a driver to talk to the Pi. [1] [7] Clone the Waveshare driver repo and run the install script:
git clone https://github.com/waveshare/WM8960-Audio-HAT
cd WM8960-Audio-HAT
sudo ./install.sh
sudo reboot
The script handles the device-tree overlay configuration automatically. [7] [8] You don’t need to edit /boot/config.txt by hand.
Step 4: Test that audio actually works.
After the reboot, SSH back in and run:
arecord -l
aplay -l
You should see your WM8960 device listed under both. [3] To do a real test, record two seconds of you saying something embarrassing and play it back:
arecord -D hw:0,0 -f cd -t wav -d 2 test.wav
aplay test.wav
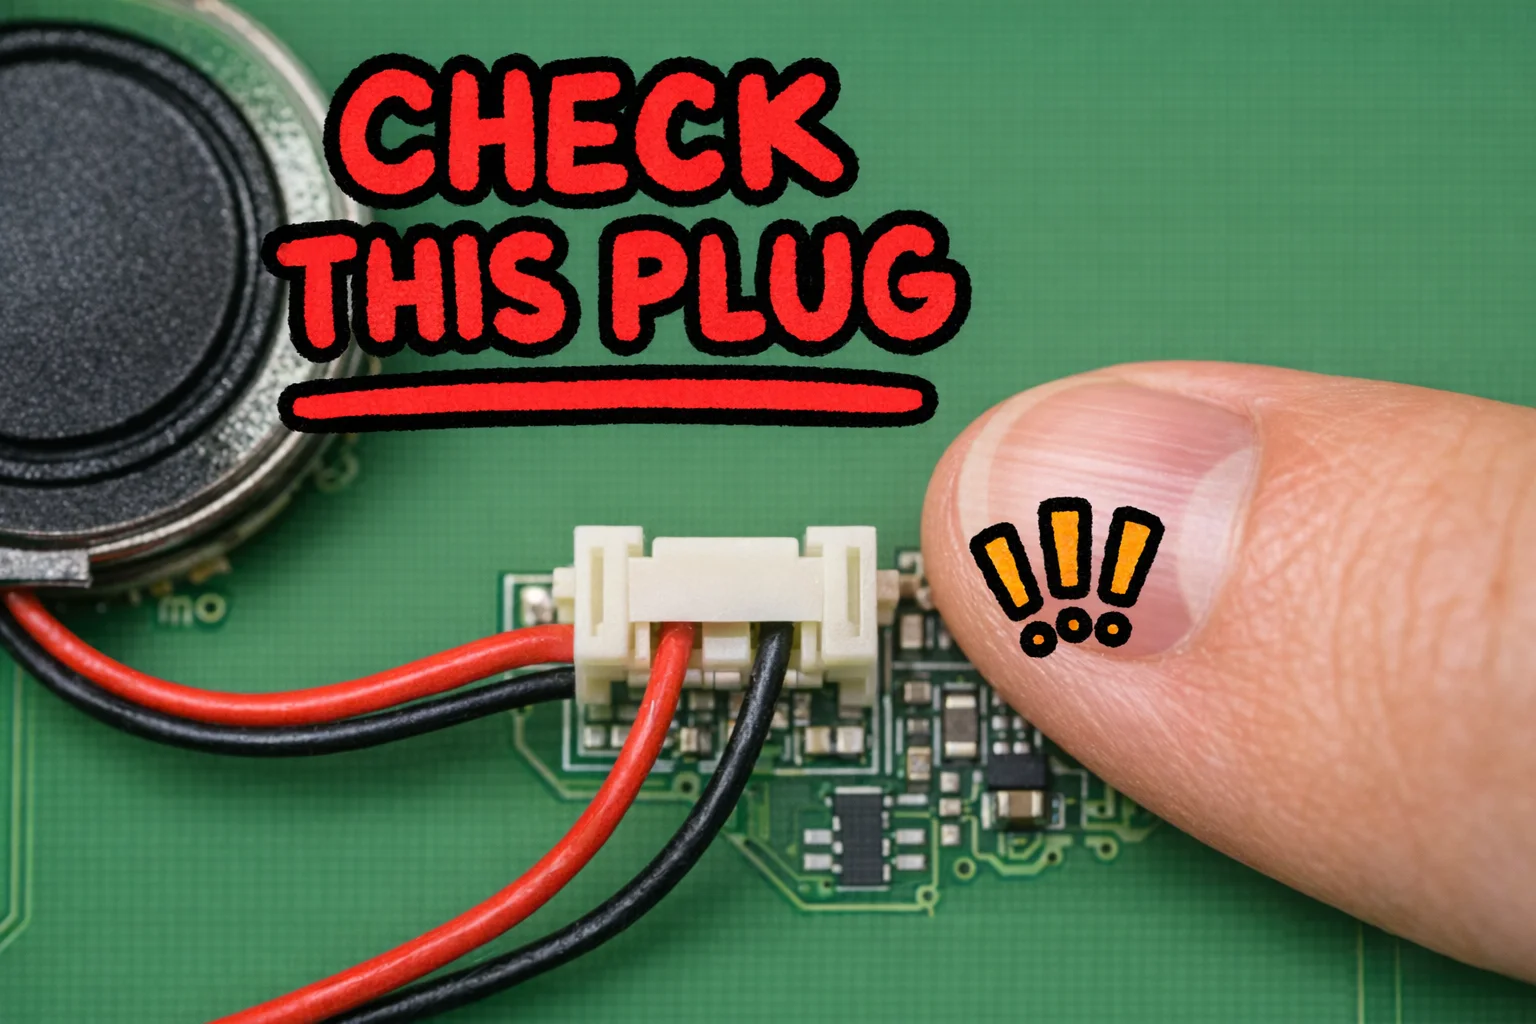
If you hear yourself, the hardware is alive. If you hear nothing, check that the speaker is seated in its connector on the HAT — it’s a small JST-style plug and it comes loose more often than it should.
Hardware confirmed. Time to make it smart.
You’ve done the hard part. Now say hello.
Everything you’ve built up to this point, the flashed SD card, the soldered HAT, the VPS humming somewhere in a data center, the API keys you copy-pasted with the nervous energy of someone defusing a bomb, it all comes down to this one command.
SSH into your Pi one more time and type:
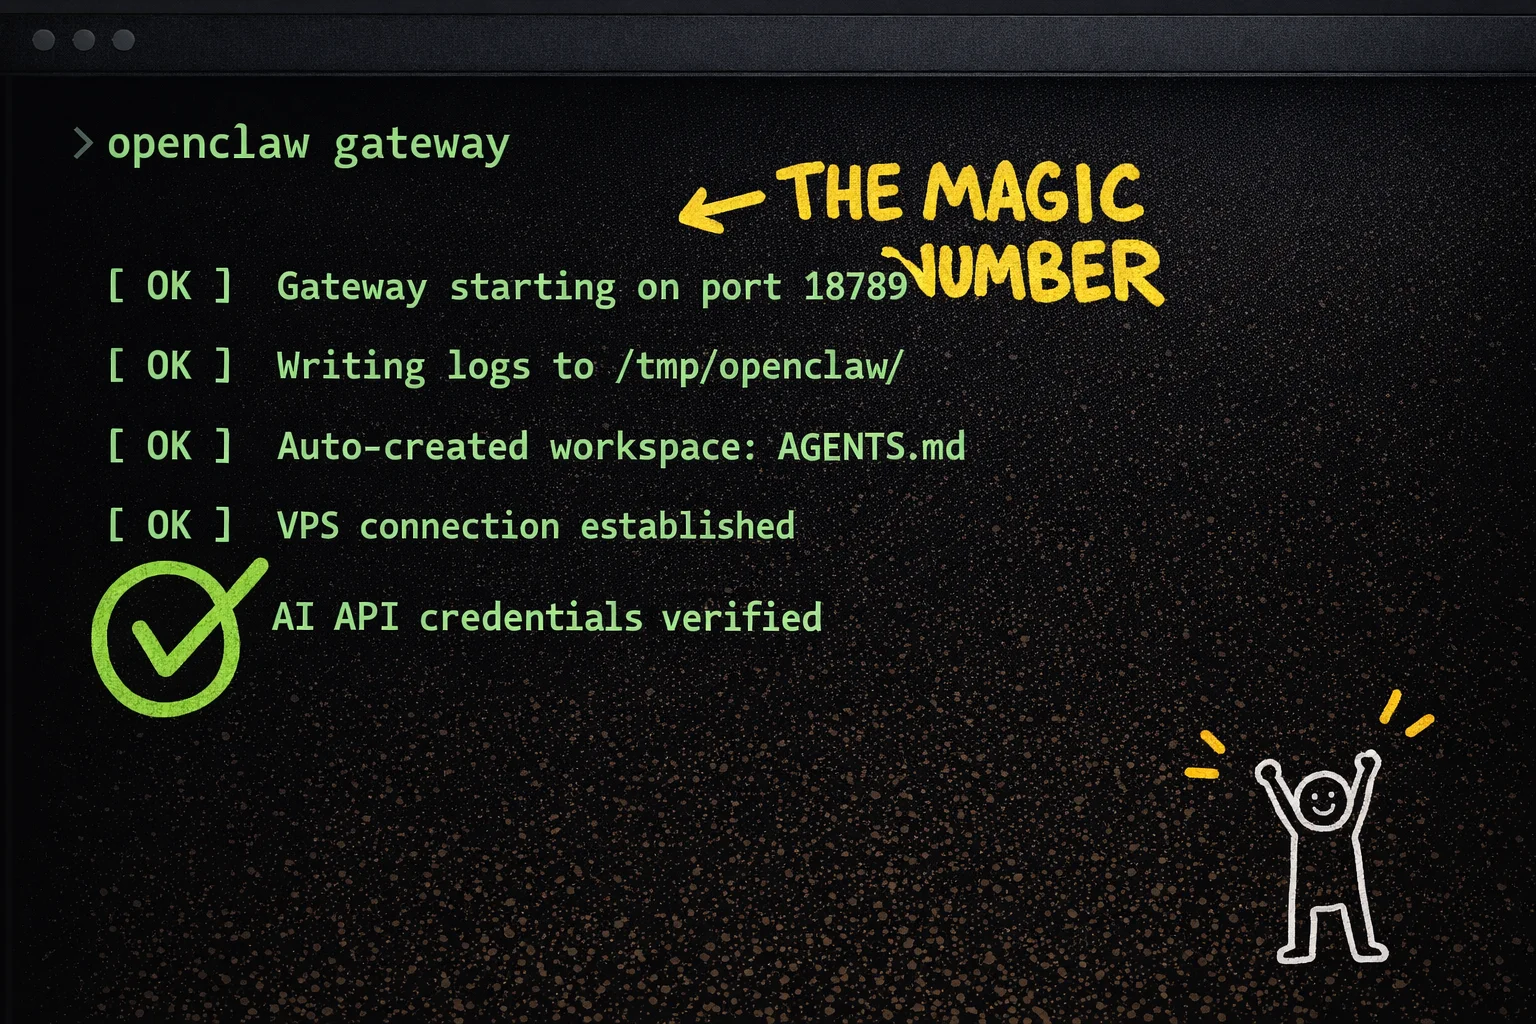
openclaw gateway
That’s it. [83] [84] That’s the ignition switch. Run it in the foreground for this first launch so you can actually SEE what’s happening instead of wondering why nothing works. The gateway starts on port 18789, writes its logs to /tmp/openclaw/, and auto-creates a workspace file called AGENTS.md that you will probably never look at but will feel good knowing exists. [85]
Watch the output. You’re looking for the gateway to confirm it’s connected, that it can reach your VPS, and that your AI API credentials checked out. If something is wrong, it will tell you here, in the foreground, where you can actually read it. This is exactly why we’re not running it as a background service yet.
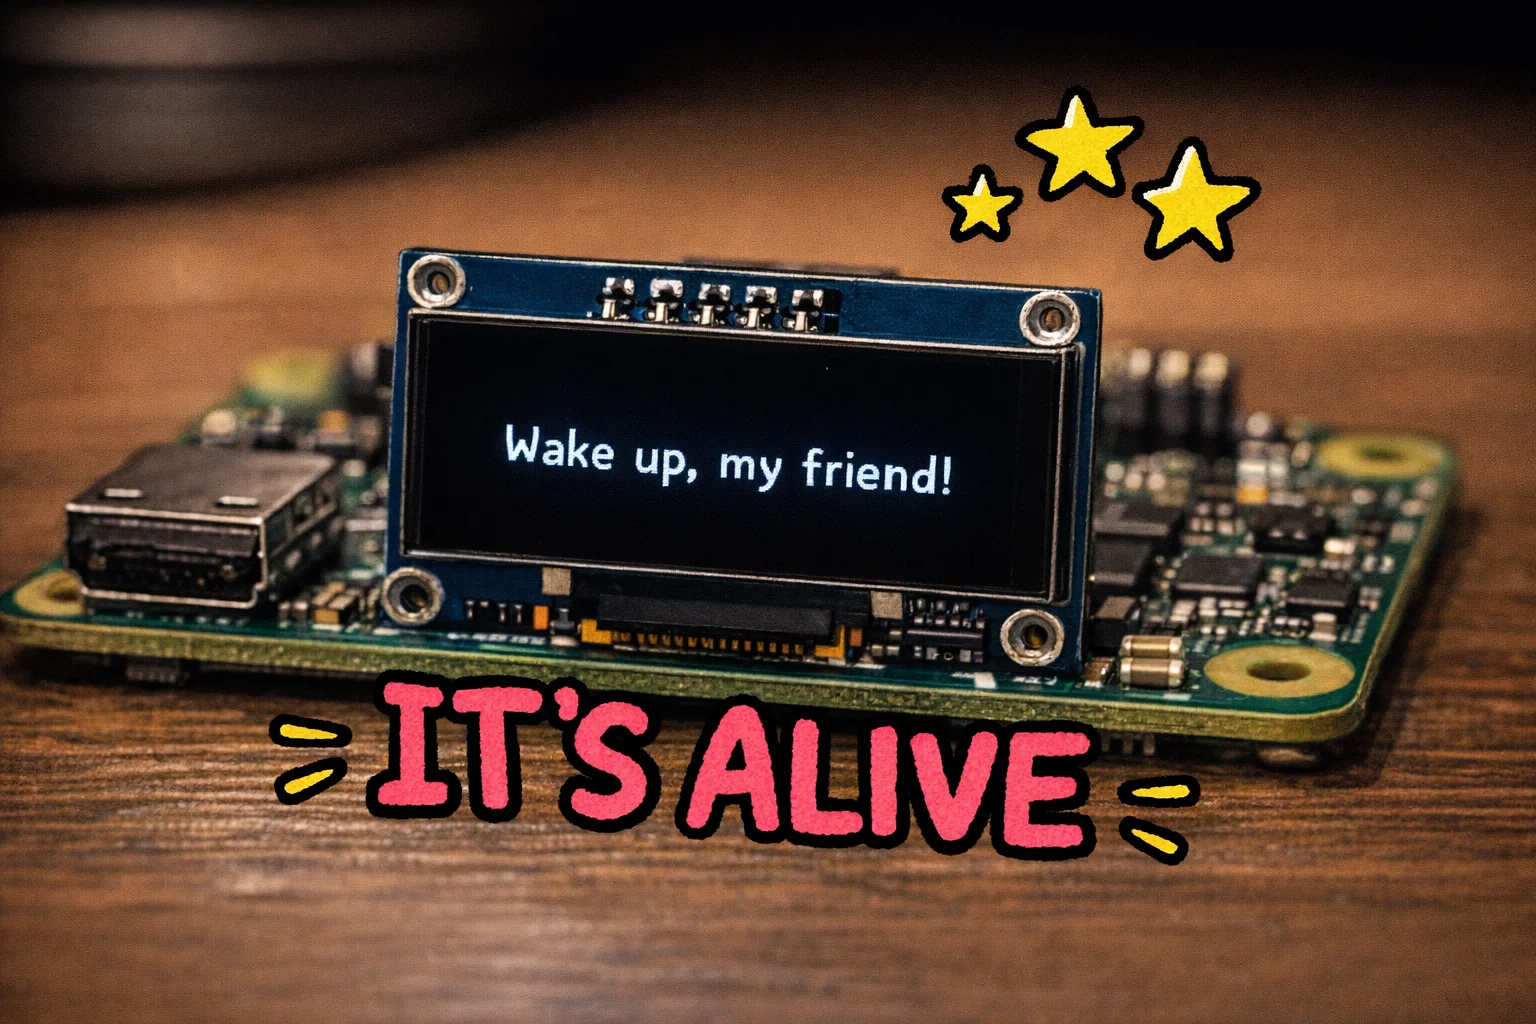
Once the logs settle and nothing is screaming at you in red, the TUI kicks in. On the Whisplay’s little display (or in your terminal if you’re watching over SSH), you’ll see something like: “Wake up, my friend!” [46] [89] Which is, honestly, a more dramatic greeting than most people get on a Monday morning.
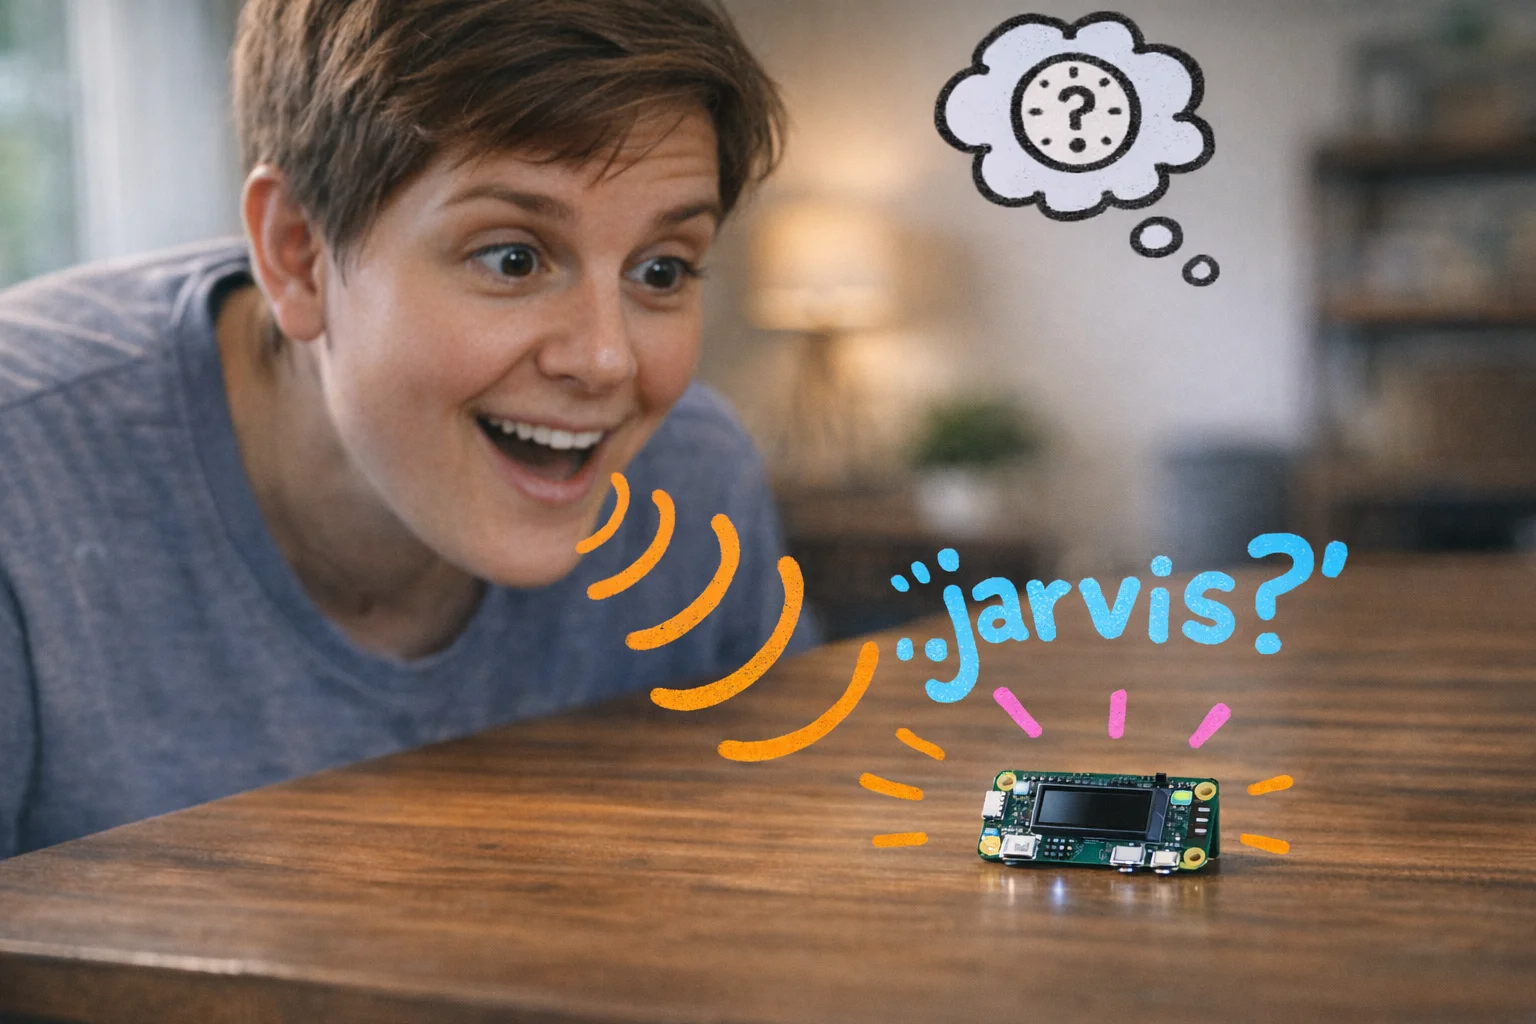
Now say your wake word. The default is “jarvis.” Just say it out loud, to a small computer sitting on your desk, like a completely normal person. The jarvis.run() loop is listening, and when it hears the wake word, the on_wake_word()_wake_word()` handler fires and the whole chain kicks off: your voice gets captured, shipped to the cloud AI, and the response comes back as audio. [86] [87] [88]
The first response will take a beat. Somewhere between 2 and 5 seconds is a realistic expectation on the Pi Zero 2 W, depending on your network and which AI model you’ve configured. [50] [91] [92] It is NOT broken. It is thinking. Resist the urge to say the wake word again.
When it talks back, you will feel something disproportionate to the situation. You built this. A $70 pile of components is now having a conversation with you. Take a second.
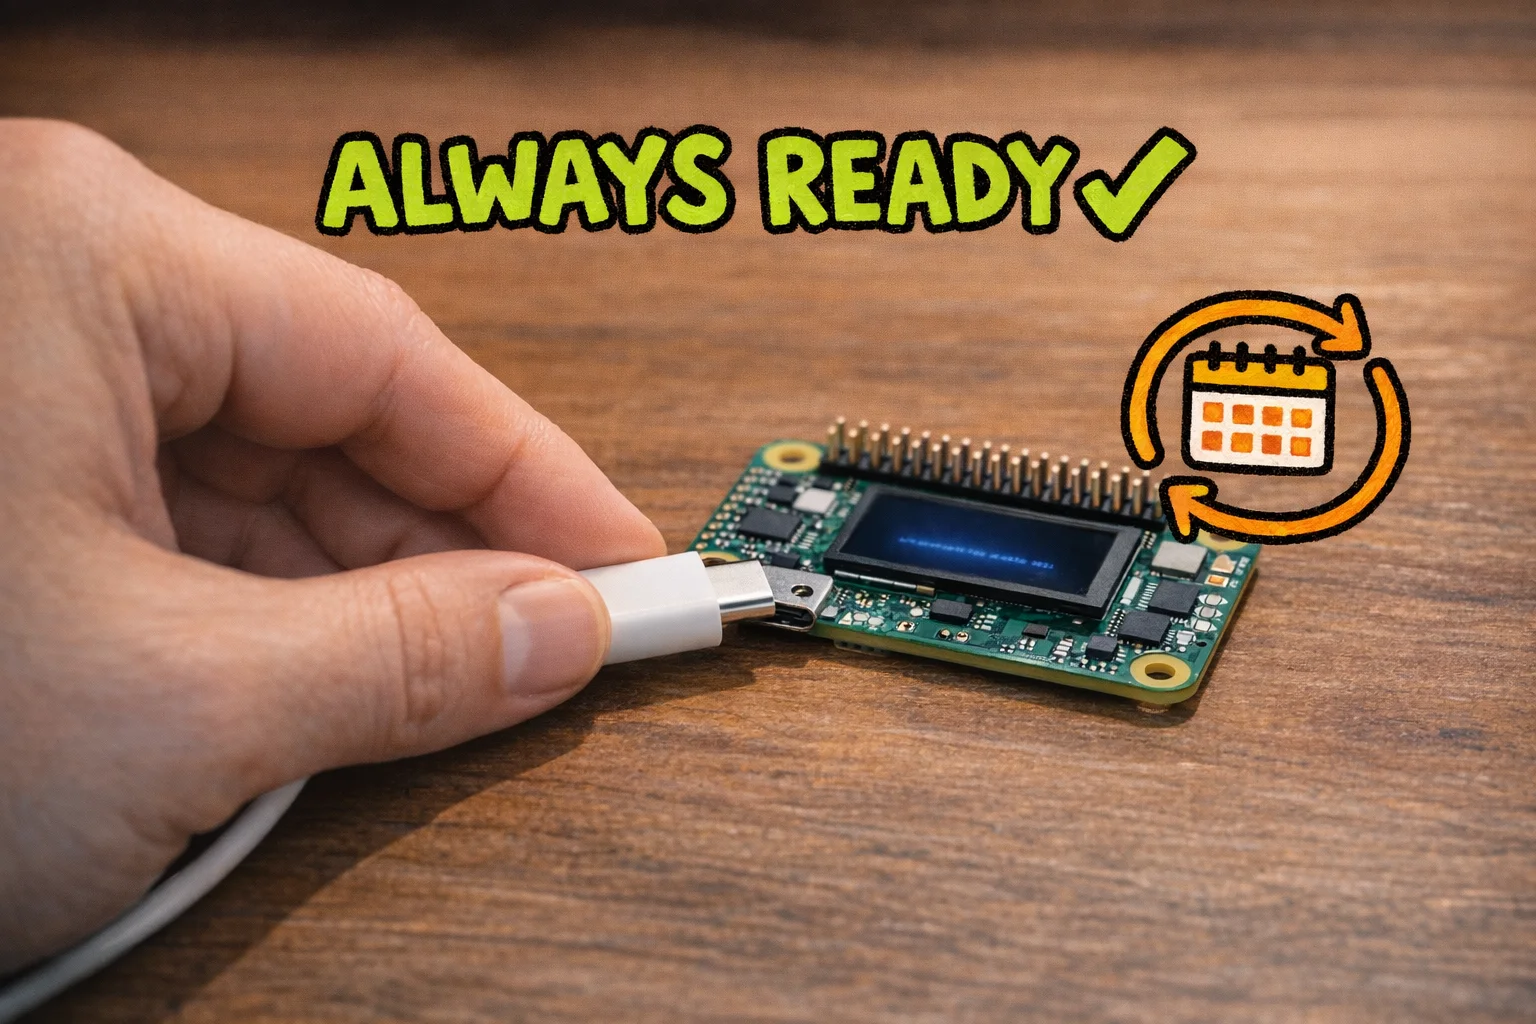
Now, let’s make sure it starts automatically every time the Pi boots, because unplugging and re-SSHing every morning is not the Jarvis experience anyone signed up for. The repo includes a systemd service file (pizero-openclaw.service) and a sync.sh script that handles copying and enabling it for you. [90] [1] Run the sync script and your assistant will be waiting for you every single time the Pi gets power, no terminal required.
bash sync.sh
Alternatively, if you want the OpenClaw-native approach: [84] [90]
openclaw daemon start
Either way, from this point forward, you plug it in and it wakes up. Just like it should.
Okay, you actually did it. Let’s talk about what that means.
You took a $15 computer the size of a credit card, wired it to a tiny speaker and a battery, typed some commands that looked like ancient runes, and now you’re holding a thing that listens to your voice and talks back using one of the most powerful AI systems on the planet. That is, objectively, insane. Not “insane” in the tech-hype sense. Insane in the sense that this would have required a corporate R&D budget and a team of engineers ten years ago, and you did it on a weekend with a soldering iron and a lot of copy-pasting.
Take a second to actually appreciate that before we talk about what comes next.
Where to go from here
Sebastian’s repo [16] and his original X post [14] are your best starting points for customization. The project files are all editable, which means you can change the wake word in the config, swap in a different AI provider by updating your API keys, or wire in new hardware like a PiSugar battery board for truly untethered use. [8] None of that requires you to be a programmer. It requires you to be comfortable opening a file and changing one line, which you have now proven you can do.
The upstream OpenClaw project [62] is also worth bookmarking. It’s actively developed, with new AI providers being added regularly (Azure support, newer model versions), and improvements there may eventually make their way into Sebastian’s Pi Zero build. The OpenClaw Discord [97] has a #help channel where real humans answer questions, which is more useful than it sounds when you’re staring at an error message at 11pm.
The honest part: what this costs you going forward
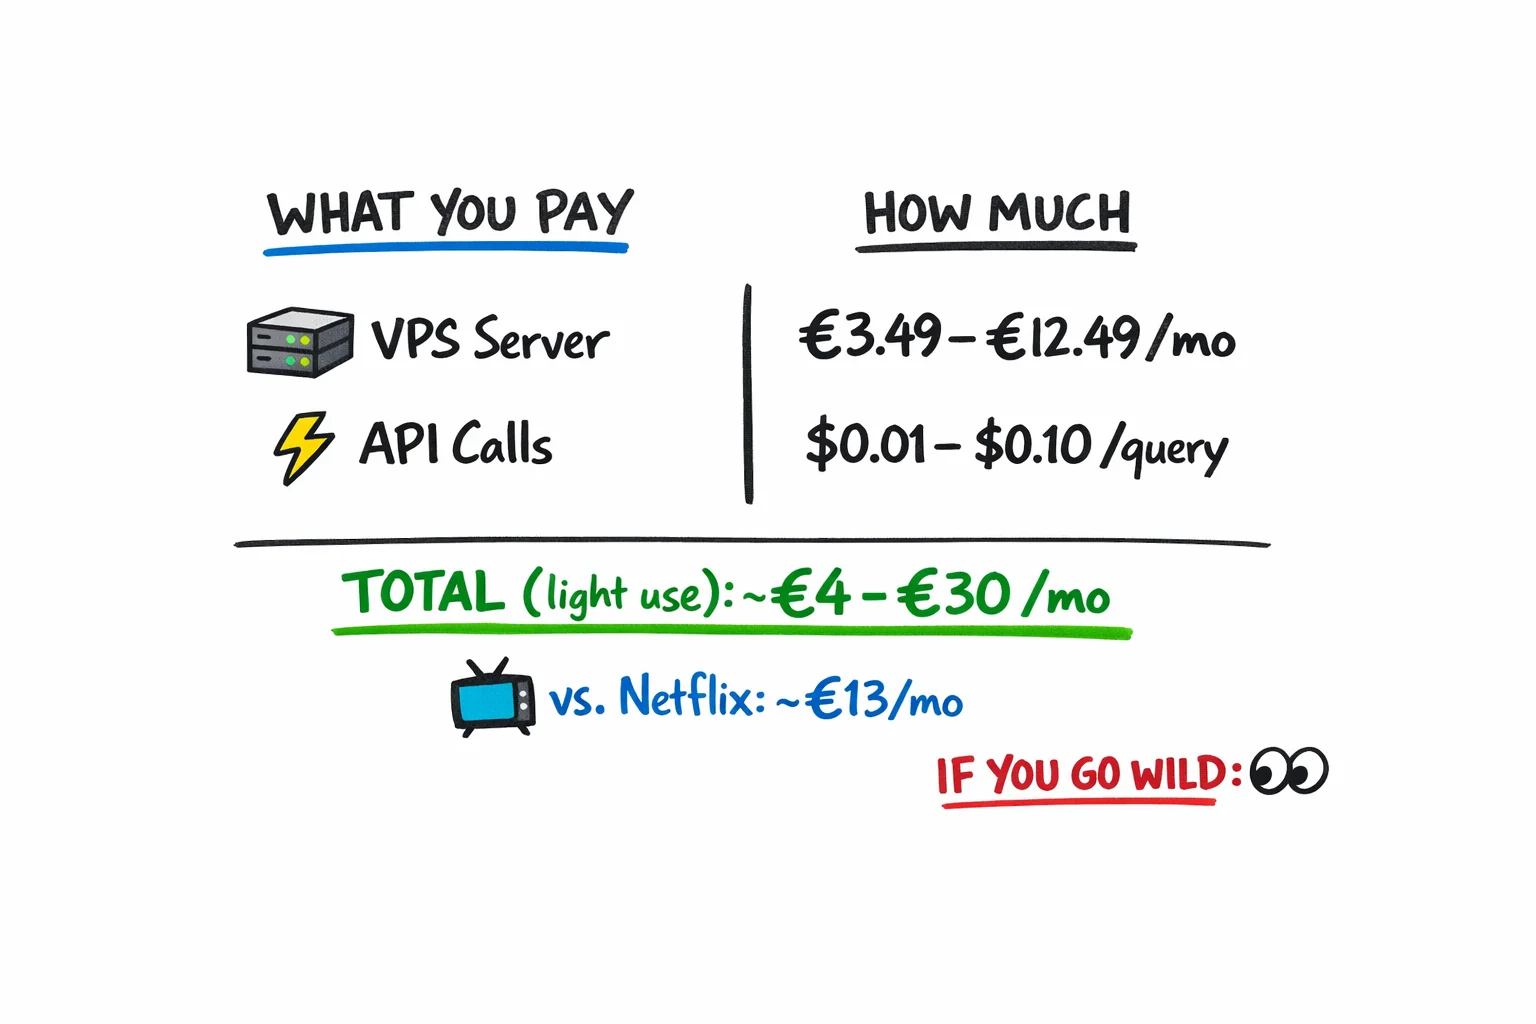
Running this thing is not free, but it’s cheap. Your VPS (the server that does the heavy AI lifting) runs roughly €3.49 to €12.49 a month depending on the tier you chose. [98] API calls to OpenAI cost somewhere around $0.01 to $0.10 per query for light conversational use, [100] so if you’re asking your assistant a few dozen questions a day, you’re probably looking at €4 to €30 a month total. That’s less than a streaming subscription. If you barely use it, it’s basically nothing. If you go wild and start piping every thought through it, watch your API dashboard.
One thing to know: the repo has no documented offline mode. [5] If your internet goes down or your VPS has a bad day, the assistant goes quiet. It’s a cloud-dependent device wearing a local-hardware costume. That’s fine, just don’t expect it to work on a plane.
The slightly philosophical bit you didn’t ask for but are getting anyway
There’s something worth sitting with here. The barrier between “person who uses technology” and “person who builds technology” just got a lot shorter. You didn’t need a computer science degree. You needed curiosity, a free weekend, and the willingness to type commands you didn’t fully understand into a terminal window.
That’s the actual story. Not the gadget. The fact that you built it.

Now go show someone. Tag Sebastian [14]. Post a photo. Break something and fix it. That’s how this goes.
Sources
[1] openclaw/README.md — https://github.com/openclaw/openclaw/blob/main/README.md
[2] OpenClaw (pjasicek) — https://github.com/pjasicek/OpenClaw
[3] Hype · Replicate (filtered: past three days) — https://hype.replicate.dev/?filter=past_three_days
[4] Using OpenClaw for AI agents — What it is and how to build intelligent workflows — https://www.c-sharpcorner.com/article/using-openclaw-for-ai-agents-what-it-is-and-how-to-build-intelligent-workflows/
[5] OpenClaw architecture guide — https://eastondev.com/blog/en/posts/ai/20260205-openclaw-architecture-guide/
[6] awesome-openclaw-skills/README.md — https://github.com/VoltAgent/awesome-openclaw-skills/blob/main/README.md
[7] The next trillion-dollar AI shift — Why OpenClaw changes everything for LLMs — https://hackernoon.com/the-next-trillion-dollar-ai-shift-why-openclaw-changes-everything-for-llms
[8] Raspberry Pi Zero 2 W — article (French) — https://www.domo-blog.fr/raspberry-pi-zero-2-w-le-nouveau-pi-zero-est-5x-plus-puissant-pour-15e-seulement/
[9] Guide d’achat Raspberry Pi — https://raspberrytips.fr/guide-achat-raspberry-pi/
[10] Raspberry Pi Zero 2 W — Fnac product page — https://www.fnac.com/mp51542047/Raspberry-Pi-Raspberry-Pi-Zero-2-W/w-4
[11] Raspberry Pi Zero 2 W — VS Code Remote — https://www.raspberrypi.com/news/raspberry-pi-zero-2-w-vs-code-remote-awesome/
[12] YouTube: Raspberry Pi Zero 2 W SSH / VS Code demo — https://www.youtube.com/watch?v=aCGbQB8K8T8
[13] The Pi Zero 2 W is the most efficient Pi — https://hackaday.com/2021/11/01/the-pi-zero-2-w-is-the-most-efficient-pi/
[14] X post by @basti_vkl — status 2025727742784983427 — https://x.com/i/status/2025727742784983427
[15] X post by @basti_vkl — hardware details (stacked design) — https://x.com/i/status/2025729393352683916
[16] sebastianvkl/pizero-openclaw — https://github.com/sebastianvkl/pizero-openclaw
[17] Raspberry Pi product series explained — https://www.raspberrypi.com/news/raspberry-pi-product-series-explained/
[18] Whisplay HAT for Pi Zero 2W (product page) — https://www.pisugar.com/products/whisplay-hat-for-pi-zero-2w-audio-display
[19] Whisplay — PiSugar product wiki (intro) — https://docs.pisugar.com/docs/product-wiki/whisplay/intro
[20] Whisplay HAT for Raspberry Pi Zero (Tindie listing) — https://www.tindie.com/products/pisugar/whisplay-hat-for-raspberry-pi-zero-w2w-audio/
[21] Raspberry Pi Zero 2 W — Rokland store — https://store.rokland.com/products/raspberry-pi-zero-2-w
[22] Raspberry Pi Zero 2 W (product page) — https://www.raspberrypi.com/products/raspberry-pi-zero-2-w/
[23] Raspberry Pi Zero 2W with headers (PiShop) — https://www.pishop.us/product/raspberry-pi-zero-2w-with-headers/
[24] WM8960 Audio HAT — Waveshare wiki — https://www.waveshare.com/wiki/WM8960_Audio_HAT
[25] WM8960 Audio HAT (Electroeshop product listing) — https://electroeshop.com/products/wm8960-audio-hat-module-for-raspberry-pi-4b-3b-3b-2b-b-a-zero-zero-w-pi-zero-wh-wm8960-hi-fi-sound-card-hat-stereo-codec-pla
[26] WM8960 Audio HAT (Hubtronics listing) — https://hubtronics.in/wm8960-audio-hat-raspberry-pi
[27] PiSugar 3 — Raspberry Pi Zero battery (product page) — https://www.pisugar.com/products/pisugar-3-raspberry-pi-zero-battery
[28] PiSugar/Whisplay (GitHub) — https://github.com/PiSugar/Whisplay
[29] Whisplay HAT — PiSugar blog — https://www.pisugar.com/blogs/pisugar-blog/whisplay-hat-raspberry-ai-chatbot
[30] Build a personal AI chatbot (article mentioning Whisplay price) — https://www.aol.com/articles/build-personal-ai-chatbot-using-171700162.html
[31] GPT-4 research (GPT-4o / GPT-4 capabilities) — https://openai.com/index/gpt-4-research/
[32] ChatGPT with Vision — Guide — https://www.v7labs.com/blog/chatgpt-with-vision-guide
[33] GPT-4 refuses to look at pictures (community thread) — https://community.openai.com/t/gpt-4-refuses-to-look-at-pictures/101776
[34] OpenAI changes (summary / notes) — https://dmicz.github.io/machine-learning/openai-changes/
[35] How to use screenshots with Custom GPT / ChatGPT — https://blog.rasterwise.com/chatgpt-take-screenshot-custom-gpt/
[36] Chat GPT-4 new capabilities — https://blog.bismart.com/en/chat-gpt-4-new-capabilities
[37] Take a screenshot on your Mac — https://support.apple.com/en-ca/102650
[38] Use screenshots on your Mac (how screenshots behave) — https://support.apple.com/en-ca/102646
[39] How to open Terminal on Mac — https://setapp.com/how-to/how-to-open-terminal-on-mac
[40] How to open Terminal on Mac (guide) — https://www.businessinsider.com/reference/how-to-open-terminal-on-mac
[41] .env.example — https://github.com/sebastianvkl/pizero-openclaw/blob/main/.env.example
[42] pizero-openclaw.service (systemd unit) — https://github.com/sebastianvkl/pizero-openclaw/blob/main/pizero-openclaw.service
[43] openclaw_client.py — https://github.com/sebastianvkl/pizero-openclaw/blob/main/openclaw_client.py
[44] main.py — https://github.com/sebastianvkl/pizero-openclaw/blob/main/main.py
[45] Repository activity (issues / PRs / commits) — https://github.com/sebastianvkl/pizero-openclaw/activity
[46] OpenClaw RaspberryPi Howto — https://ajfisher.me/2026/02/03/openclaw-raspberrypi-howto/
[47] OpenClaw Raspberry Pi setup — hardware guide — https://zenvanriel.nl/ai-engineer-blog/openclaw-raspberry-pi-setup-hardware-guide/
[48] Raspberry Pi OpenClaw (news article) — https://gigazine.net/gsc_news/en/20260220-raspberry-pi-openclaw/
[49] OpenClaw on Raspberry Pi — Installing OpenClaw — https://learn.adafruit.com/openclaw-on-raspberry-pi/installing-openclaw
[50] Turn your Raspberry Pi into an AI agent with OpenClaw — https://www.raspberrypi.com/news/turn-your-raspberry-pi-into-an-ai-agent-with-openclaw/
[51] OpenClaw on Raspberry Pi — video — https://www.youtube.com/watch?v=vXcTPzuHsoM
[52] Raspberry Pi Software — download Raspberry Pi Imager — https://www.raspberrypi.com/software/
[53] rpi-imager — Releases — https://github.com/raspberrypi/rpi-imager/releases
[54] A new Raspberry Pi Imager — https://www.raspberrypi.com/news/a-new-raspberry-pi-imager/
[55] Raspberry Pi — first setup headless guide (no monitor) — El Bruno — https://elbruno.com/2024/12/13/raspberrypi-1st-setup-no-monitor-%F0%9F%93%BA-wifi-%F0%9F%93%B6-auto-connect-ssh-rename-update-docker-%F0%9F%90%B3-rust-and-more-update-2024-apr-30/
[56] Raspberry Pi headless Bookworm WiFi config — https://www.zansara.dev/posts/2024-01-06-raspberrypi-headless-bookworm-wifi-config/
[57] rpi-imager issue #878 (credentials/behavior bug report) — https://github.com/raspberrypi/rpi-imager/issues/878
[58] Raspberry Pi Foundation ditches default username policy — https://www.computerweekly.com/news/252515795/Raspberry-Pi-Foundation-ditches-default-username-policy
[59] How to change the default account username and password (Pi Hut) — https://thepihut.com/blogs/raspberry-pi-tutorials/how-to-change-the-default-account-username-and-password
[60] Raspberry Pi default password guide — SunFounder — https://www.sunfounder.com/blogs/news/raspberry-pi-default-password-guide-new-setup-changes-and-security-tips
[61] YouTube video (Itmf-5TCRKE) — https://www.youtube.com/watch?v=Itmf-5TCRKE
[62] openclaw/openclaw (GitHub) — https://github.com/openclaw/openclaw
[63] Hype listing (Replicate) - OpenClaw references — https://hype.replicate.dev
[64] Hype listing (past week filter) — https://hype.replicate.dev/?filter=past_week
[65] OpenClaw quickstart (aimlapi docs) — https://docs.aimlapi.com/quickstart/openclaw
[66] OpenRouter — OpenClaw integration guide — https://openrouter.ai/docs/guides/guides/openclaw-integration
[67] Z.AI devpack — OpenClaw tool docs — https://docs.z.ai/devpack/tool/openclaw
[68] YouTube video (7DBQng1ZnIs) — OpenClaw/OpenRouter discussion — https://www.youtube.com/watch?v=7DBQng1ZnIs
[69] OpenClaw integrations — https://openclaw.ai/integrations
[70] Moonshot / Kimi integration with OpenClaw — https://platform.moonshot.ai/docs/guide/use-kimi-in-openclaw
[71] OpenClaw — Hetzner install / architecture docs — https://docs.openclaw.ai/install/hetzner
[72] Deploy OpenClaw — Pulumi blog (AWS / Hetzner example) — https://www.pulumi.com/blog/deploy-openclaw-aws-hetzner/
[73] OpenClaw — environment, config, and .env docs — https://docs.openclaw.ai/help/environment
[74] OpenClaw on Raspberry Pi — Overview — https://learn.adafruit.com/openclaw/overview
[75] PiSugar / Whisplay HAT – assembly / demo video — https://www.youtube.com/watch?v=Nwu2DruSuyI
[76] Raspberry Pi GPIO Pinout — https://pinout.xyz
[77] WM8960 audio codec — SparkFun tutorial / hookup guide — https://learn.sparkfun.com/tutorials/sparkfun-top-phat-hookup-guide/wm8960-audio-codec
[78] Hi-Fi record and playback sound card HAT (WM8960 / product page) — https://pmdway.com/products/hi-fi-record-and-playback-sound-card-hat-for-raspberry-pi
[79] Raspiaudio forum — installation / user discussion — https://forum.raspiaudio.com/t/ultra-installation-guide/21?page=10
[80] PiSugar battery for Raspberry Pi Zero — project log — https://hackaday.io/project/164733-pisugar-battery-for-raspberry-pi-zero
[81] PiSugar — Battery FAQ — https://docs.pisugar.com/docs/product-wiki/battery/faq
[82] Raspberry Pi AI chatbot Whisplay HAT — article — https://www.bgr.com/2088723/raspberry-pi-ai-chatbot-whisplay-hat/
[83] Start OpenClaw — https://docs.openclaw.ai/start/openclaw
[84] OpenClaw CLI (blog) — https://safeclaw.io/blog/openclaw-cli
[85] openclaw-ai-assistant (repo) — https://github.com/syntax-syndicate/openclaw-ai-assistant
[86] WHISPLAY_IDEAS.md — pizero-openclaw — https://github.com/sebastianvkl/pizero-openclaw/blob/main/WHISPLAY_IDEAS.md
[87] Voice Wake node (OpenClaw) — https://docs.openclaw.ai/nodes/voicewake
[88] Build your personal Jarvis using OpenClaw — https://writerdock.in/blog/build-your-personal-jarvis-using-openclaw
[89] OpenClaw FAQ / Help — https://docs.openclaw.ai/help/faq
[90] sync.sh (pizero-openclaw) — https://github.com/sebastianvkl/pizero-openclaw/blob/main/sync.sh
[91] ZeroClaw review (Rust alternative) — https://sparkco.ai/blog/zeroclaw-review-the-rust-based-openclaw-alternative-with-99-smaller-footprint
[92] openclaw issue #5871 (performance / startup delays) — https://github.com/openclaw/openclaw/issues/5871
[93] Issue #72 · pjasicek/OpenClaw — https://github.com/pjasicek/OpenClaw/issues/72
[94] Issue #4021 · openclaw/openclaw — https://github.com/openclaw/openclaw/issues/4021
[95] Discussion #1968 · openclaw/openclaw — https://github.com/openclaw/openclaw/discussions/1968
[96] OpenClaw — News, Resources & Guide — https://help.apiyi.com/en/openclaw-news-resources-guide-en.html
[97] OpenClaw — Discord channels (docs) — https://docs.openclaw.ai/channels/discord
[98] Hetzner Cloud — Products & Pricing — https://www.hetzner.com/cloud
[99] Hetzner Cloud Pricing (cost analysis) — CostGoat — https://costgoat.com/pricing/hetzner
[100] Hetzner vs ScalaHosting (VPS comparison) — https://www.vpsbenchmarks.com/compare/hetzner_vs_scalahosting
[101] sebastianvkl (GitHub profile) — https://github.com/sebastianvkl
If you read this far, you'll like what's next.
One essay a month, roughly. No noise, no sponsored content, no threads.